A Cheap and Flexible (Literally!) Softbox
or...
An Even Better Bounce Card
Introduction
Inspired by A Better Bounce
Card and
ggjoser's
softbox projects, I decided to make something similar. What I wound
up with, though, was a bit better than those projects, so I thought
I'd write it up so other people could try out the same ideas.
My bounce system works like a LumiQuest softbox, a Better Bounce Card,
and a Sto-Fen Omni-Bounce all rolled into one. Best of all, it costs
only a few dollars to make!
Materials
For each bouncer, you will need the following materials:
- Two sheets of fun foam or equivalent, roughly 8.5x11in or
22.5x30cm. These cost about 33 cents each at Wal-Mart or an
art supply store (call ahead, because not all stores carry
them). My local Wal-Mart was out of stock, so I bought a $6
pack of 30x45cm sheets in multiple colors, cut two sheets in
half to make bouncers, and gave the rest to my daughter for
crafts projects.
- 4-6 inches (10-15 cm) of white hook-and-loop fastener strips
(Velcro). Actually, you need that much loop material, but
only need about 1 cm of hooks. The strips should be about 1/2
inch (1 cm) wide.
- A stapler and staples, or glue that's appropriate for gluing
the hook-and-loop material to the fun foam. The glue will
look nicer, but I went with the security of the staples.
- A rubber band.
In addition, it's nice (but not necessary) to have a rotary-blade
paper cutter for making straight cuts.
Assembly
I started out by making a prototype from a sheet of white paper. That
allowed me to get the dimensions correct and be sure everything was
going to work out.
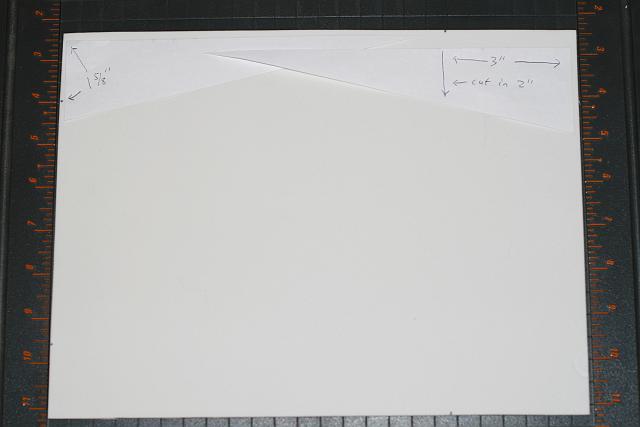
- Using a black pen, make very small marks on the white foam in
preparation for cutting. The cuts will be similar to those
used to make
A Better Bounce Card,
except that the cut will end about 3 inches (7,5cm) from what
will become the top of the softbox. The marks at what will
become the bottom (narrowest part) of the softbox should be
placed such that the foam will just barely wrap around three
sides of the flash unit. Use your white paper to make sure
you get it correct, and try your flash in both the "long" and
"wide" modes. For my Sigma EF-500 DG Super, and with the
22.5-cm-wide foam, my marks were 1-5/8 inches in from the
edge. The very bad photo at right has random pieces of paper
placed on top of the foam to show where the marks were made.
The cut will follow the triangular paper at the left of the
photo.
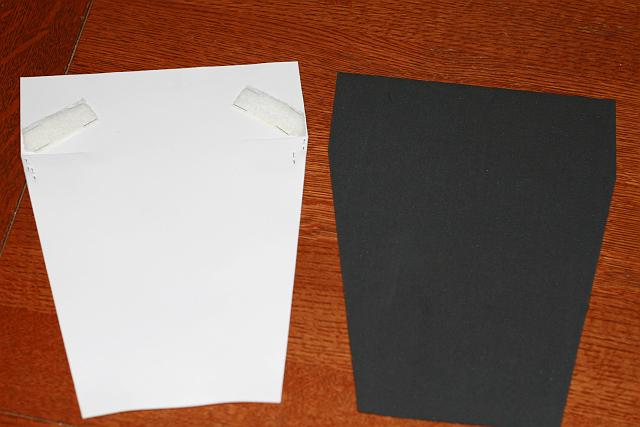
- Cut as straight a line as possible between your marks, again
following the general design of
A Better Bounce Card
but ending before the top of the card. See the second photo
at right.
- Repeat the same cuts on the black foam. I found that my
black pen made a visible mark that I could use to guide my
cuts.
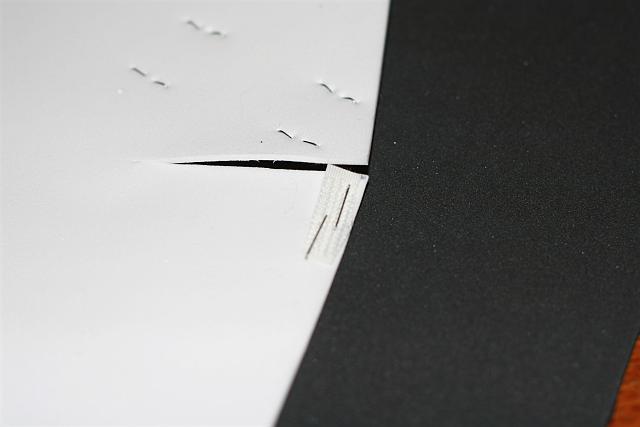
- Starting from the place where your previous cuts ended on the
white sheet (3 inches or 7,5 cm from the wide part of the
foam), cut 2 inches (5 cm) inward.
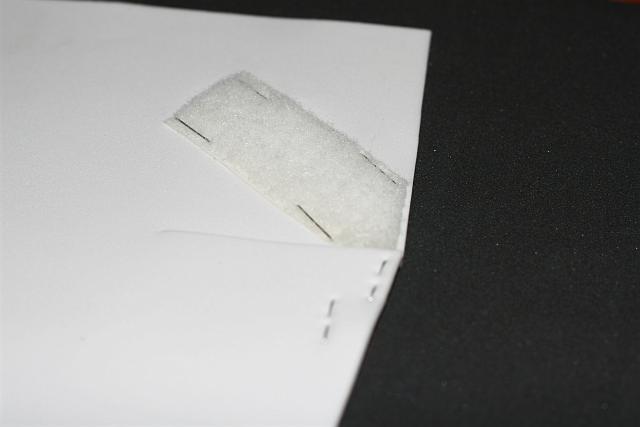
- Using staples or glue, attach a very small piece of fastener
hooks just below the inward cuts (see photo). These hooks
will be used to hold the top of the box down.
- Turn the white foam over, and using staples or glue, attach a
longer strip of fastener loops at an angle above the cuts. To
determine the length, fold the upper part of the sheet down at
a 90-degree angle (see usage photos below) and mark where the
hooks will need to attach. Try the fold at several angles to
ensure that the hooks will always be able to engage the
loops. Trim the loops so that they neatly fit the corner of
the foam.
Usage
Attach your bouncer to the flash unit with a rubber band. (I like to
keep a spare on my flash in case one breaks.)
The advantage of the softbox is its flexibility. In its simplest
mode, you can use it exactly like
A Better Bounce Card, to
throw most of your light up while sending some forward to create
catchlights in the subject's eyes. (The fastener hooks should face
forward to make other applications possible.)
If your catchlights are too bright, you can reduce the amount of light
sent forward by simply folding the bouncer back.
By folding the top of the foam forward and fastening it with the hooks
and loops, you can make a softbox similar to a LumiQuest. You can
set the top at various angles to control how the light is distributed.
By folding the entire softbox forward, tucking the front end under the
rubber band, and closing it up with the hook-and-loop fasteners, you
get an effect like the Sto-Fen Omni-Bounce. Here, I've set the flash
unit at low power to show how the light is diffused.
If you're in a situation (such as a wedding) where the light diffusing
through the back of your bouncer is objectionable, simply rubber-band
the black foam behind the white sheet. There is no need to make
special folds in the black foam; simply let it stick up straight while
you adjust the white foam according to your needs.
This page is maintained by
Geoff Kuenning.


