
Lab 9: The Game of Life
Submission: Submit your hw9pr1.py file to GradescopeJohn Conway's Game of Life
Download this starter folder:hw9pr1.zip
The Game of Life is a cellular automaton invented by John Conway, a mathematician from Cambridge, England. The Game of Life is not so much a "game" in the traditional sense, but rather a process that transitions over time according to a few simple rules. The process is set up as a grid of cells, each of which is "alive" or "dead" at a given point in time. At each time step, the cells live or die according to the following rules:
- A cell that has fewer than two live neighbors dies (because of isolation).
- A cell that has more than 3 live neighbors dies (because of overcrowding).
- A cell that is dead and has exactly 3 live neighbors comes to life.
- All other cells maintain their state.
Thinking about life
As always, it is important to break the problem down into pieces and develop the program in stages so that others can understand the code and so that you can ensure that each piece is correct before building on top of it. We will break this problem down into the following steps:- Creating a 2D array of cells
- Displaying the board (in various colors) and updating it with new data
- Allowing the user to change the state of the cells
- Implementing the update rules for the "Game of Life"
- (Optionally) Running and stopping the simulation
Files to start with…
Start by downloading the .zip file from the following link:
hw9pr1.zip
It will be easiest to place this zip file on the desktop and extract
it there. There is some support code for graphically displaying your
life generations, but that's the final piece of the lab.
Part 1: Creating a 2D "board" of cells: createOneRow and createBoard
In the hw9pr1.py file, you will see this example function:
def createOneRow(width):
    """Returns one row of zeros of width "width".
       You might use this in your createBoard(width, height) function."""
    row = []
    for col in range(width):
        row += [0]
    return row
This function offers a starting point for creating
one-dimensional lists—but the same idea applies for
building arbitrarily deep nested list structures.
(Note: this function can be written in other, more concise, ways.
However, the approach given here is a good prototype for creating a
more complex list without getting into trouble with how Python works
internally.)
Test out the provided createOneRow function:
In [1]: run hw9pr1.py

In [2]: createOneRow(5)
Out[2]: [0, 0, 0, 0, 0]

In [3]: createOneRow(42)
Out[3]: [0, 0, 0, 0, 0, 0, 0, 0, 0, 0, 0, 0, 0, 0, 0, 0, 0, 0, 0, 0, 0, 0, 0, 0, 0, 0, 0, 0, 0, 0, 0, 0, 0, 0, 0, 0, 0, 0, 0, 0, 0, 0]
Now, we'll leap from this one-dimensional row of data... ... to a two-dimensional grid of data: an array
createBoard(width, height)
Building on this example, write a function named createBoard(width, height) that creates and returns a new 2D list of height rows and width columns, in which all of the data elements are 0 (no graphics quite yet, just a Python list!). Avoid re-implementing the createOneRow function! Rather, use createOneRow inside your createBoard in the same way that 0 is used to accumulate individual elements in createOneRow. Here is a template—copy and paste this and then fill in the parts you'll need to complete it:
def createBoard(width, height):
    """Returns a 2D array with "height" rows and "width" columns."""
    A = []
    for row in range(height):
        A += [SOMETHING]  # Use the above function so that SOMETHING is one row!
    return A
That's all you'll need! Again, the idea is to follow the example of
createOneRow—but instead of adding a 0 each time,
the function would add a whole row of 0s, namely the result
from createOneRow!
Test out your createBoard function!
In [1]: A = createBoard(5, 3)
In [2]: A
Out[2]: [[0, 0, 0, 0, 0], [0, 0, 0, 0, 0], [0, 0, 0, 0, 0]]
Part 2: Printing your 2D board of cells: printBoard
You no doubt noticed that when Python prints a 2D list, it blithely ignores its 2D structure and flattens it out into one line (perhaps wrapping, if needed). To print your board in 2D using ASCII, copy this function into your file:Note: there's one line missing! Perhaps you already see it...
def printBoard(A):
    """This function prints the 2D list-of-lists A."""
    for row in A:                # row is the whole row
        for col in row:          # col is the individual element
            print(col, end = '') # Print that element
Next, try out printBoard. As-is, it's not quite right:
In [1]: A = createBoard(5, 3)
In [2]: printBoard(A)
000000000000000
Your task Add one line so that printBoard shows our 2D array as two-dimensional! The line is print()—an empty print statement. Where should it go?! Be sure to test your improved printBoard:
In [1]: A = createBoard(5, 3)
In [2]: printBoard(A)
00000
00000
00000
Part 3: Adding patterns to 2D arrays: diagonalize, innerCells, and randomCells
To get used to looping over 2D arrays of data, copy this function named diagonalize(A) into your file:
def diagonalize(width, height):
    """Creates an empty board and then modifies it
       so that it has a diagonal strip of "on" cells.
       But it does that only in the *interior* of the 2D array.
    """
    A = createBoard(width, height)

    for row in range(1, height - 1):
        for col in range(1, width - 1):
            if row == col:
                A[row][col] = 1
            else:
                A[row][col] = 0

    return A
This function diagonalize accepts a desired width and
height. It then
creates an array A and sets A's data so that its
elements are all 0 except for the interior
diagonal where row == col.
Try displaying the result with these commands:
In [1]: A = diagonalize(7, 6)

In [2]: A
Out[2]:
[[0, 0, 0, 0, 0, 0, 0],
 [0, 1, 0, 0, 0, 0, 0],
 [0, 0, 1, 0, 0, 0, 0],
 [0, 0, 0, 1, 0, 0, 0],
 [0, 0, 0, 0, 1, 0, 0],
 [0, 0, 0, 0, 0, 0, 0]]

In [3]: printBoard(A)
0000000
0100000
0010000
0001000
0000100
0000000
Take a moment to note the direction the diagonal is running—that indicates which way the rows of the board are being displayed: top-to-bottom, in this case. Note that this code uses range(1, height - 1) and range(1, width - 1) in order to avoid changing the edges.
- We will continue this pattern throughout the lab, since the rules of the Game of Life don't account for edge cells (they don't have 8 neighbors).
height and width do not have to
be the same—though it's certainly OK if they are.
More patterns: innerCells(w, h)
Based on the example of diagonalize, write a variation named innerCells(w, h) that returns a 2D array that has all live cells—with a value of 1—except for a one-cell-wide border of empty cells (with a value of 0) around the edge of the 2D array. For example, you might try:In [1]: A = innerCells(5, 5) In [2]: printBoard(A) # Remember: up-arrow for this! 00000 01110 01110 01110 00000This is only a small variation on diagonalize!
More patterns: randomCells(w, h)
Next, create a function named randomCells(w, h), which returns an array of randomly-assigned 1's and 0's except that the outer edge of the array is still completely empty (all 0's) as in the case of innerCells. Here is one of our runs:In [1]: A = randomCells(10, 10) In [2]: printBoard(A) # Up-arrow! 0000000000 0100000110 0001111100 0101011110 0000111000 0010101010 0010111010 0011010110 0110001000 0000000000Of course, your output will be different because it's random. You might recall that random.choice([0, 1]) will return either a 0 or a 1. You will need to import random to use it!
Part 4: Evolving patterns: copy(A) and innerReverse(A)
Each of the updating functions so far creates a new set of cells without regard to an old "generation" that it might depend on. Conway's Game of Life, on the other hand, follows a set of cells by changing one generation into the next. To see why copy(A) is a crucial helper function for this process, try the following commands:
In [1]: A = innerCells(5, 5)  # create a 5x5 innerCells board

In [2]: printBoard(A)         # Up-arrow
00000
01110
01110
01110
00000

In [3]: newA = A              # Creates a false ("shallow") copy

In [4]: printBoard(newA)      # Up-arrow and edit... LOOKS the same...!
00000
01110
01110
01110
00000

In [5]: A[2][2] = 5           # Set old A's center to 5

In [6]: printBoard(A)         # There's a 5 in the middle...
00000
01110
01510
01110
00000

In [7]: printBoard(newA)      # Note that newA changed, too--Aargh!
00000
01110
01510
01110
00000
Here we have made a "shallow copy" of A, naming that shallow copy newA.
However,
newA is simply a copy of the reference to the original data in A!
As a result, when A's data changes, so does newA's data, even though we
never touched newA's data!
(It's similar to telling your friend that you left the address to meet
at on the Shanahan chalkboard. If somebody changes the chalkboard
before your friend sees it, they'll go to the wrong place! You should
have just told your friend the address...)
The above example shows shallow copying: the copying of a reference to data, rather
than making a full copy of all of the data.
Making a full copy of all of the data is called deep copying.
Writing copy(A), a "deep" copier...
Starting with this code:
def copy(A):
    """Returns a DEEP copy of the 2D array A."""
    height = len(A)
    width = len(A[0])
    newA = createBoard(width, height)

    for row in range(1, height - 1):
        for col in range(1, width - 1):
            newA[row][col] = ____________ # What should be here, in order to
            # ..copy each element of A into the corresponding spot in newA?

    return newA
Finish its implementation to create a function named copy(A),
which will make a deep
copy of the 2D array A.
As usual, don't worry about the outside edges: they'll always stay 0. The loops only touch the non-edge cells.
Thus, copy will accept a 2D
array A as its argument. And, copy will return
a brand-new 2D array of data that has the same pattern as the original array.
You can make sure your copy function is working properly with this example:
In [1]: A = innerCells(5, 5)  # Create a 5x5 innerCells board

In [2]: printBoard(A)         # Up-arrow
00000
01110
01110
01110
00000

In [3]: newA = copy(A)

In [4]: printBoard(newA)
00000
01110
01110
01110
00000

In [5]: A[2][2] = 5

In [6]: printBoard(A)         # Changes it!
00000
01110
01510
01110
00000

In [7]: printBoard(newA)      # UNchanged!
00000
01110
01110
01110
00000
This time, newA has not changed even though A did: it's a true, "deep" copy.
Aside: Python's built-in deepcopy
Your copy function returns a deep copy of its argument. This is useful enough to be part of Python. To use that version, you can runfrom copy import deepcopy # in file or terminal newA = deepcopy(A) # needs to be in the terminalNow you've seen how it's implemented: element-by-element! Feel free to use either one.
More building blocks: innerReverse(A)
Copying is a straightforward way that a new "generation" of array elements might depend on a previous one. Next you'll write a function that changes one generation of cells into a new generation. To that end, write a function innerReverse(A) that takes an old 2D array A (an old "generation") and then creates a new generation newA of the same shape and size, using createBoard or copy. However, with innerReverse the new generation should be the "opposite" of A's cells everywhere except on the outer edge. In the same spirit as innerCells, you should make sure that the new generation's outer edge of cells is always all 0. However, for inner cells—those not on the edge—where A[row][col] is a 1, the new array's value will be a 0—and vice versa.Try out your innerReverse function by displaying an example. This one uses randomCells:
In [1]: A = randomCells(8, 8) In [2]: printBoard(A) 00000000 01011010 00110010 00000010 01111110 00101010 01111010 00000000 In [3]: A2 = innerReverse(A) In [4]: printBoard(A2) 00000000 00100100 01001100 01111100 00000000 01010100 00000100 00000000Aside: You might point out that it would be possible to simply change the old argument A, rather than create and return new data—this is true for simply reversing the pattern of array elements, but it is not true when implementing the rules of Conway's Game of Life—there, changing cells without copying would change the number of neighbors of other cells!
The Game of Life
The Conway version, not the boardgame version!To implement the Game of Life's full set of rules, you'll create two functions:
- countNeighbors(row, col, A) and
- next_life_generation(A)
Helper function: countNeighbors(row, col, A)
It will help to write a helper function, countNeighbors(row, col, A), which should return the number of live neighbors for a cell in the board A at a particular row and col. There are two basic approaches to countNeighbors:- Write two small "for" loops to examine the nine cells centered at A[row][col].
- You'll naturally add the center. This is OK—just be sure to subtract it before returning!
- OR, write eight if statements to check all eight possible neighbors...
- Note that you want ALL eight to run. So, use if for all of them—don't use elif: it's too "exclusive."

- Note that you want ALL eight to run. So, use if for all of them—don't use elif: it's too "exclusive."
In [1]: run hw9pr1

In [2]: A = [[0, 0, 0, 0, 0], [0, 0, 1, 0, 0], [0, 0, 1, 0, 0], [0, 0, 1, 0, 0], [0, 0, 0, 0, 0]]  # Vertical bar

In [3]: printBoard(A)
00000
00100
00100
00100
00000

In [4]: countNeighbors(2, 1, A)
Out[4]: 3                # Correct! There are 3 live neighbors here

In [5]: countNeighbors(2, 2, A)
Out[5]: 2                # Be sure not to count the cell itself!

In [6]: countNeighbors(0, 1, A)
Out[6]: 1
Main function: next_life_generation(A)
Finally, you'll write next_life_generation, which implements the rules of Life. This will be most similar to innerReverse, so you might use that as a template. Here is a starting signature for next_life_generation:
def next_life_generation(A):
    """Makes a copy of A and then advances one
       generation of Conway's Game of Life within
       the *inner cells* of that copy.
       The outer edge always stays at 0.
    """
This next_life_generation function should accept a 2D array
A, representing the "old" generation of cells, and it should
return a new generation of cells, each either 0 or
1,
based on John Conway's rules for the Game of Life:
- Be sure to create a newA, the new generation, which is of the same size as A, the old generation.
- All edge cells stay zero (0), as usual (but see the extra challenges, below).
- A cell that has fewer than two live neighbors dies (because of loneliness).
- A cell that has more than 3 live neighbors dies (because of overcrowding).
- A cell that is dead and has exactly 3 live neighbors comes to life.
- All other cells maintain their existing state (are given the value of the corresponding old cell).
- Only count neighbors within the old generation A. Change only the new generation, newA.
- Be sure to set every value of newA (the new data), whether or not it differs from A.
- A cell is NOT a neighbor of itself.
- A 2x2 square of cells is statically stable (if isolated)—you might try it on a small grid for testing purposes
- A 3x1 line of cells oscillates with period 2 (if isolated)—also a good pattern to test.
In [1]: A = [[0, 0, 0, 0, 0], [0, 0, 1, 0, 0], [0, 0, 1, 0, 0], [0, 0, 1, 0, 0], [0, 0, 0, 0, 0]]  # vertical bar

In [2]: printBoard(A)
00000
00100
00100
00100
00000

In [3]: A2 = next_life_generation(A)

In [4]: printBoard(A2)
00000
00000
01110
00000
00000

In [5]: A3 = next_life_generation(A2)

In [6]: printBoard(A3)
00000
00100
00100
00100
00000
and so on. Once your Game of Life is working, look for some of the other common patterns, e.g., other statically stable forms ("rocks"), as well as oscillators ("plants") and others that will move across the screen, known as gliders ("animals" or "birds").
Terminal-graphics Life: lifedemo()
To get a smoother animation of your evolving Life-generations, runlifedemo()You should have that function at the bottom of your hw9pr1.py file. If you don't, they're below for copy-and-paste. Here is one "frame" of the default terminal animation, with a glider and two "air dancers." Plenty of room to customize!
..........................................
..........................................
....................X.....................
....X...............X...............X.....
..X.X...............X...............X.....
...XX...............................X.....
..........................................
..........................................
..........................................
..........................................
..........................................
..........................................
..........................................
..........................................
..........................................
..........................................
..........................................
..........................................
..........................................
..........................................
..........................................
Living Life to the fullest…
Requires doing more than CS. (Alas!) If your Game of Life is happily "lifing," you've reached the end of lab—we hope it has provided a new lease on Life—or at least has been lively… Be sure to submit yourhw9pr1.py file!
Variations on the Game of Life [Optional - these may be better to wait until the final project option...]
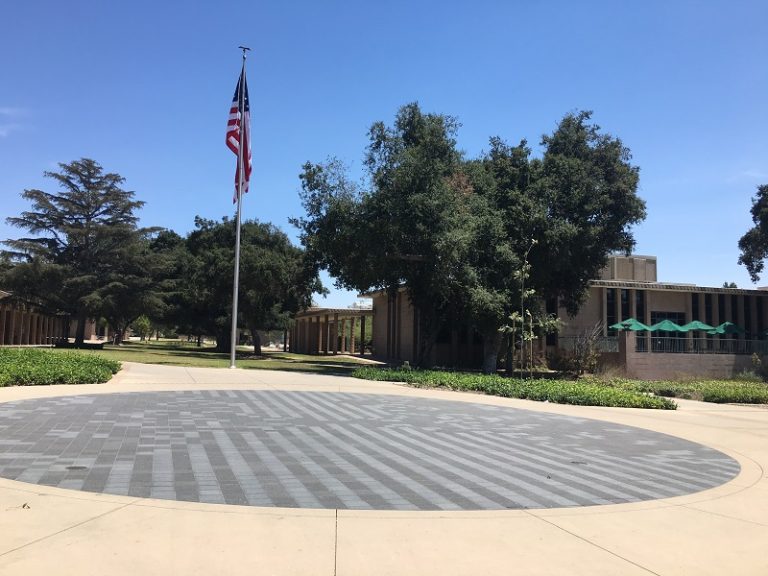
That said, there's always more! If you'd like, you might try implementing a variation on the Game of Life: Variation One: the doughnut For this variation, remove the margin of empty cells around the board. In this case, the board should have the topology of a doughnut—so that the left and right edges of the board become neighbors, as do the top and bottom edges. This makes neighbor-counting and avoiding out-of-bounds errors trickier. Yet with a single function that "looks up" the actual location of any given row and col coordinate pair, it's not too bad… Variation Two: alien life Life is considered a 23/3 cellular automaton, because cells survive with 2 or 3 neighbors (the two digits before the slash) and they are born with 3 neighbors (the digit after the slash). Many (perhaps all) of the other survival/birth possibilities have been studied, as well. Some even have names: for example, 1358/357 is called "Amoeba" and 1/1 is called "Gnarl." For this variation on life, choose a different set of survival/birth rules, perhaps from this reference of them and implement a key or function that switches between John Conway's Game of Life and your chosen set of rules (with another key or function to go back…). Variation Three: More cells! You can also create rules that allow for cells of more than two types. You might set colors for up to 8 types of cells, as well, numbered 0 through 7.What's up with HMC's concrete Game of Life configuration... ?
We're happy you asked!- It's a required emergency-vehicle turnaround
- The GoL configuration is 42 feet in diameter
- It's the 313th generation of this .rle file, runnable in Golly. It's the second-to-last example on this page.
- here is the HMC magazine article on it and an image:
Here are those terminal-graphics functions ...
Here are the functions you'll need in hw9pr1.py file to run lifedemo()
#
# +++ Helper functions for when Life has been completed! +++
#
"""
These functions allow for "terminal-graphics animation."
Once next_life_generation is complete, run:
lifedemo()
You may need to adjust your terminal's shape or size to
create a smooth animation.
"""
def printBoard_with_d(A, d = None):
"""This function prints the 2d list-of-lists A
using the dictionary d
"""
if (d == None) or (0 not in d) or (1 not in d): # Can we use d?
for row in A:
for col in row:
print(col, end = '') # Use raw contents
print()
else:
for row in A:
for col in row:
print(d[col], end = '') # Look each value up
print()
def placeObject(row, col, A, offsets):
"""Creates an arbitrary object whose upper-left corner
is at row row and column col. 1's are placed at the
coordinates given by offsets, which is a list of
coordinate pairs."""
H = len(A)
W = len(A[0])
for row_offset, col_offset in offsets:
r = row + row_offset
c = col + col_offset
if 0 < r < H-1 and 0 < c < W-1:
A[r][c] = 1
# No need to return A; A is changed in place!
def placeGlider(row, col, A):
"""Creates a glider with a bounding box
whose upper-left corner is at row row and column col
"""
OFFSETS = [[+0,+1], [+1,+2], [+2,+0], [+2,+1], [+2,+2]]
placeObject(row, col, A, OFFSETS)
# No need to return A; A is changed in place!
def placeAirDancer(row, col, A):
"""Creates an up-down air dancer (also known as a
stoplight) with its upper-left corner at row row
and column col
"""
OFFSETS = [[+0,+0], [+1,+0], [+2,+0]]
placeObject(row, col, A, OFFSETS)
# No need to return A; A is changed in place!
import time
def lifedemo():
"""ASCII demo!
"""
W = 42 # Alter to suit!
H = 21 # Alter to suit!
A = createBoard(W, H) # Empty grid
placeGlider(2, 2, A)
placeAirDancer(2, 20, A)
placeAirDancer(3, 36, A)
# A = randomCells(W, H) # Random grid
# dictionaries to indicate what to print
# d = {0: 0, 1: 1}
# d = {0: 0, 1: " "}
d = {0: ".", 1: "X"}
# d = {0: " ", 1: "0"}
# d = {0: " ", 1: "#"}
# d = {0: "▯", 1: "▮"}
# d = {0: " ", 1: "🙂"}
while True:
print("\n")
printBoard_with_d(A, d)
print("\n")
A = next_life_generation(A)
time.sleep(0.42)
# The terminal colors don't seem as successful
# d = { 0: "\033[6;36;47m0\033[0m", 1: "\033[6;37;40m1\033[0m" }
# www.cs.hmc.edu/twiki/bin/view/CS5/TerminalColorsInPython