
Lab 0: Terminal, Text-editing, and Python
Welcome to CS 5, Lab 0!
This lab is worth 15 points, and is best if done individually, so that you know Python works on your computer! That said, you're welcome to pair up on this, too.Welcome! This is the Web page of the first problem (the lab problem) in CS 5. The goals of this lab are:
- To make sure you can access all of the tools and sites you'll need for CS5
- To make sure you've successfully installed Python and a text editor
- To introduce you to a command-line interface, text editing, and Python
- To read, edit, and run a "Hello" program in Python
- To challenge you to solve some "four fours" problems in Python
- To make sure you can submit hw0pr1.py to the submission system (that's the four-fours problem)
Software installing!
Installing CS5's software
What software are we using?
CS 5 uses some software you might not already have. The default software we use is- Python we simply use the latest plain-old-python version. As of Spring 2024 that's 3.12 ish.
- A text editor for editing Python files.
- By default, we use VSCode, a free, widely used text editor available for all operating systems (Mac, Windows, Linux).
- By default, we use VSCode, a free, widely used text editor available for all operating systems (Mac, Windows, Linux).
- Frequent question: Is it ok to use different software instead?
- Frequent answer: Yes, usually: In this case, it's up to you to make sure your setup is equivalent. Definitely chat with your instructor!
[Task 1] Download and install VSCode
Visual Studio Code (VSCode) is a free text editor, widely used for editing software source code.- Here is the download/install page for VSCode Start here...
- Its install process is pretty typical. Worries?, ask us! At labs, grutoring hours, before/after class, etc.
- Suggestion: Start up VSCode and choose Keep in Dock (Mac) or Pin to Taskbar (Windows). You'll want it around, at least for this semester!
As you wait for downloads and installs, read over—and sign—the honor-code and appropriate-use agreement, here:
CS's appropriate-use agreement Waiting for a download...? Read this over...!
We <3 the honor code. The HMC and Claremont Colleges' honor codes, of course, hold for CS work and activities as they do everywhere. Because CS maintains a full set of computers, software resources, and accounts, our department clarifies how the honor code applies to those computing resources with an appropriate-use policy.Thus, we ask every student who takes a HMC CS course to complete this form: CS appropriate-use policy (a Google Form). Note: because this Web form is open to all email addresses, you will need to complete one of the "captcha"-type visual-recognition challenges to submit it. Concerns? Let us know.
Forms filled? VSCode installed? Onward to file-editing
Using VSCode as an editor
Try out VSCode, a text editor
- Text editors are different from word processors.
- Google Docs and Microsoft Word and other word processors format things beautifully
- But they don't provide direct access to the actual contents of the file!
- Special, non-visible characters carry around the formatting information
- Since all programming languages use raw text (strings of characters), (plain-)text editors are the right toolset for CS!
- So, start your text editor—likely VSCode, if you just installed it...
- If you're on the CS lab machines, here's how to find VSCode:
- Click on the desktop shortcut to Additional Applications
- In the window that appears, choose Text or Text Editors—from there, you'll see it.
- If you're on the CS lab machines, here's how to find VSCode:
- What about the "Welcome" questions?
- Color themes are fun! Feel free to optimize...
- We'd skip the "Sync to other devices"
- The one shortcut to rule all shortcuts is command-shift-p (on Mac) and control-shift-p (on Windows).
- It is a good idea to install the support for the Python language (it's one of the first options) You can also do this later.
- Eventually, you should have a blank panel—when you do, type some text introducing yourself. Include
- your name
- a hometown (or more than one)
- a favorite
- a least-favorite
- For example, here's Zach's file:

- Go ahead and save your version as intro.txt
- Save it to your Desktop or to a CS5 folder—it's up to you.
- It will look something like this:

- Submit! Submit this very-small file to Gradescope under intro.txt
- To submit your file, you will want to go to the GradeScope site for this class. Here's a [[https://www.gradescope.com/courses/707415/assignments/3926249][direct link to the assignment].
- You're already signed up for GradeScope!
- Not sure what your GradeScope ID is? It's the one they used when the emailed you, check the
To:address for that email! - If you don't remember your password, reset it!
- If you already have a GradeScope account from a different class, you can merge two accounts. Please make sure your account has your full name listed.
- Not sure what your GradeScope ID is? It's the one they used when the emailed you, check the
- It's great to be comfortable creating plain-text files!
- Note: All source-code files are just plain-text files! That's next...
- Autosave! it is a great idea to set VSCode to autosave all of your files.
- Here is where the option is located:
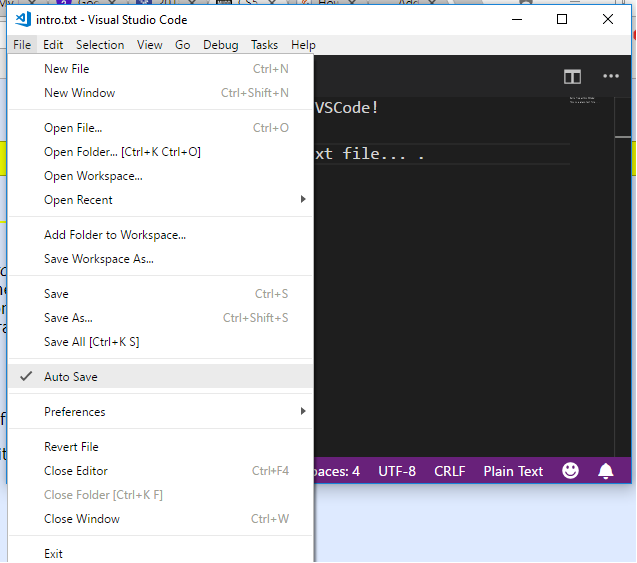
- Here is where the option is located:
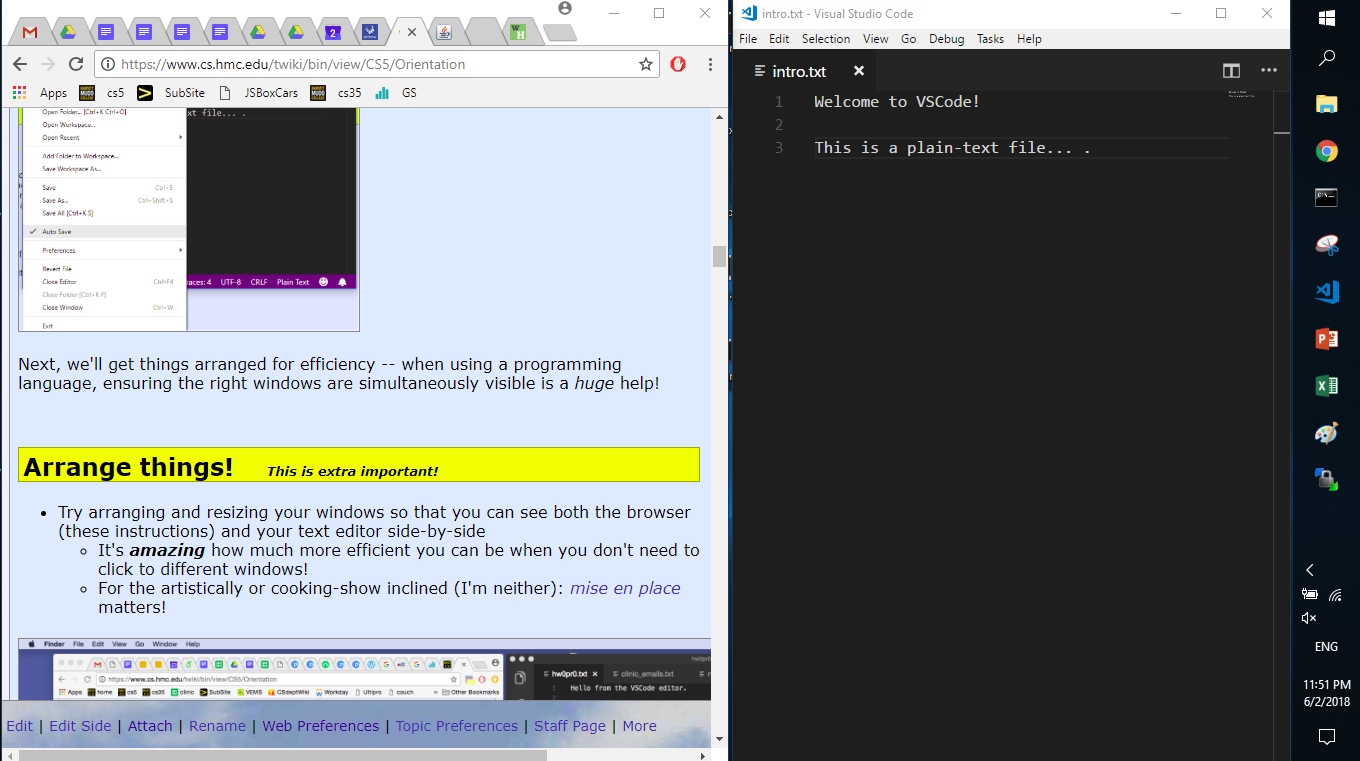
Next, we'll get things arranged for efficiency—when using a programming language, ensuring that the right windows are simultaneously visible is a huge help!
Arrange things! This is extra important!
- Try arranging and resizing your windows so that you can see both the browser (these instructions) and your text editor side-by-side
- It's amazing how much more efficient you can be when you don't need to click to different windows!
- For the artistically or cooking-show inclined (we're neither): mise en place matters!
- Here's an example of a Windows setup:
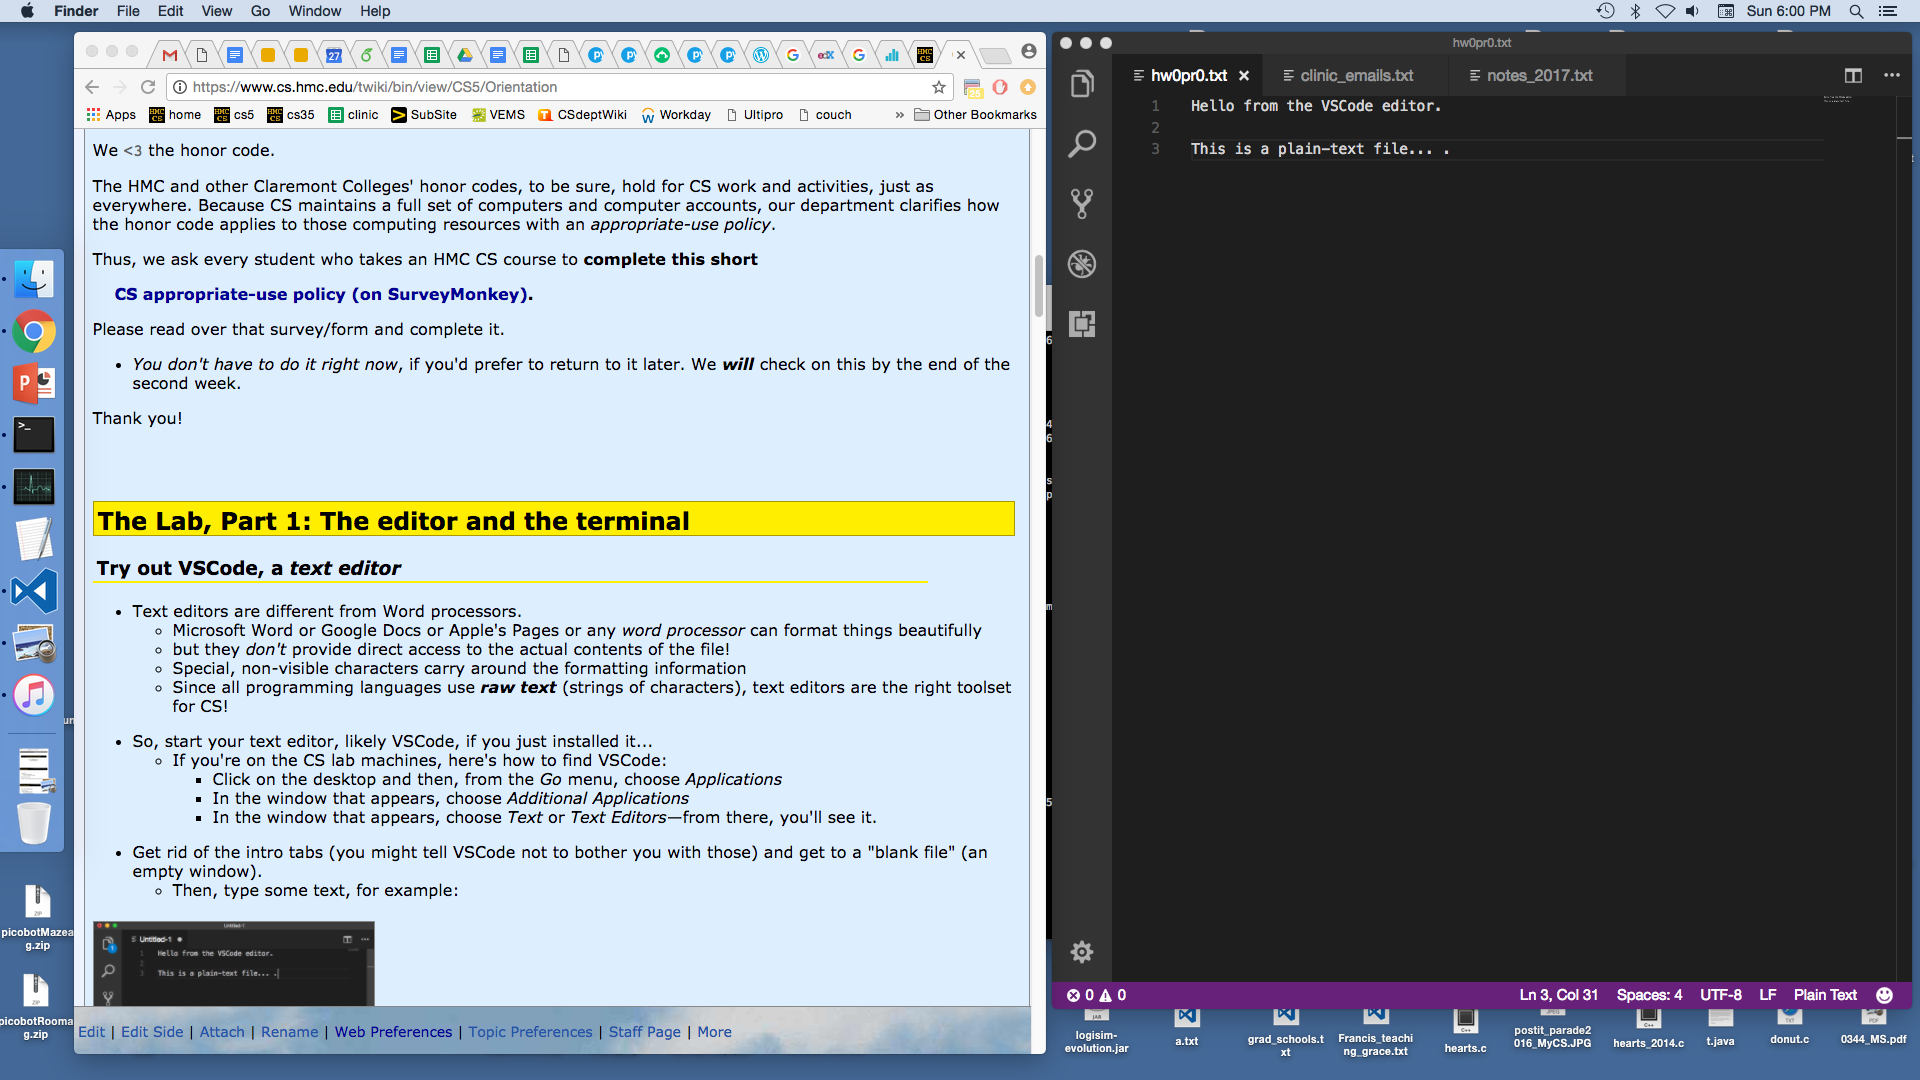
- and a Mac setup:
- Explore the VSCode menus a little bit. We usually choose View and then Hide Status Bar and Hide Activity Bar... But changing the color theme is even more fun!
- Color theme! Don't spend too much time on it, but feel free to choose your favorite color theme for VSCode (menus: File/Code ... Preferences ... Color Theme) This is great fun—perhaps it can be too much fun...!)
Next, you'll install Python...
[Task 2] Download and install Python
Python is a popular language for lots of things. Its list-of-uses seems to grow each year.- Below is the download/install page for Python. But, first read this warning:
- Warning for Windows users Be sure to check this "Add to PATH" checkbox:

- [ Windows ] This is a direct link to the Python 3.12.1 installer for Windows.
- [ Mac ] This is a direct link to the Python 3.12.1 installer for Mac.
- General downloads page: Here is the download/install page for Python.
Let's test it! We'll run Python within a terminal. Next, you'll open a Terminal Window...
The Terminal Window
Terminal Window? Most of our interactions with computers are through the windows provided by the OS. The "OS," short for Operating System, is usually either Windows or Mac OS, although there are many others, Linux being the most common. The OS you use provides a windowing system that lets you use a mouse, interact with the computer in an intuitive fashion, and order Starbucks through PostMates. The click-and-drag interface of today's windowing systems is definitely a "good thing"! However, the graphical interface is also a curtain—one that disconnects users from what's happening with the various files on their device. It's a flexible and useful skill to have a clear picture of how files are being used behind the windowing system's curtain. The Terminal is a program that gets "behind" that curtain. It uses textual commands, the so-called "command line," to handle files and actions on your machine. Feeling comfortable around the command line is essential for many pathways that create computation. The OS already handles consuming computation brilliantly!Start your terminal! So, to pull back your OS "curtain," go to your VSCode text-editor and, among the menus, choose View and then Terminal. You should see a split screen:
 The upper half is still the text editor.
The lower half is now your terminal window. The terminal goes by many names:
The upper half is still the text editor.
The lower half is now your terminal window. The terminal goes by many names: - The terminal
- The shell
- The command line
Running python3 at the terminal ...
Here's a picture of running the python3 command, at the terminal, on a Mac:
- If you're on a Mac, it may tell you you need to "install the developer tools" - you do want to do this.
- Many times, but not always your Mac will say you need to install the "developer tools," which looks like this:

- You should do this. It will take a while, and time may run backwards! (I blame Relativity.) Here were three sequential screenshots from our run:


- Sometimes it's fast, sometimes slow. Let it run...
In fact, feel free to work on the four fours in the meantime! Here is an online site (a Colab) to make progress. Until...

- Many times, but not always your Mac will say you need to install the "developer tools," which looks like this:
- If you're on Windows, it may tell you it "can't find" python3 ...
- In this case, try python with no 3
- Still not working? Don't worry! Ask!
- This can be tricky and we want to help get it to work!
- Windows systems can stash things in places that are tricky to find.
If python3 - or python - is working, stupendous! If not, ask!
Once python is happy, our plan is to install a helpful Python library. That's next:
Installing the ipython library ...
Throughout cs5, we use an interface known as ipython or interactive python Here's a picture of the ipython install command, in a terminal, on a Mac:
Let's install it!
- Open a terminal in VSCode, as above.
- At the prompt, try pip3 install ipython
- No pip3 on Windows? Try pip install ipython
- No pip either? Try C:\Users\dodds\AppData\Local\Programs\Python\Python312\Scripts\pip3 install ipython
- You will need to change the bold part to your own username, which is probably part of your prompt.
- For many Macs and Windows machines, this will work.
- Not sure? Ask us!
- Open up a new terminal. Sometimes, you may need to restart VSCode, then open a new terminal.
- At the prompt, type ipython
- If it thinks for a few seconds and then shows In [1]: the ipython prompt, you're set!
- An alternative way to run ipython is python -m IPython or python3 -m IPython
- Not to worry!!
- Grab an instructor or a peer tutor -- one of Mudd's "grutors" -- to help...
- Things it could be
- Especially on Windows, it might be pip, not pip3
- On some systems, there may be so many Pythons that it's gotten confused. Ask us!
- Here are the full paths to pip3 on our reference Win/Mac installations. The default for you may be similar:
- Windows: C:\Users\dodds\AppData\Local\Programs\Python\Python312\Scripts\pip3
- Mac: /usr/local/bin/pip3
Ok! It worked! But, what just happened?! The above is an example of a common practice with Python (and all programming languages):
- You have a language, and you'd like to use one of the many libraries for it...
- So, you install the library... This is usually done at the command-line, or terminal.
- The command pip3 or pip is Python's default installer (different systems use slightly different names)
- The library you installed was named notebook
- It provides the ipython interface, and it provides a browser-interface named jupyter notebooks, hence its name...
- There are many more libraries—they're really Python's distinctive strength. We'll install more later, as needed.
Start ipython...
Here's a picture of running ipython in a terminal, on a Mac. Whether you're on a Mac or Windows, try it! If it worked, you're set! If not, ask! 🦔 ☕
If ipython isn't found, then
- Perhaps it's not installed—that's the previous section in this lab...
- Perhaps you're on Windows and Windows can't find where ipython was installed (this is common)
- If you suspect it's this, try pasting C:\Users\dodds\AppData\Local\Programs\Python\Python312\Scripts\ipython.exe
- ... but, be sure to replace zdodds with your Windows username
- Or—if you're having any troubles, it's better to ask! This is where the grutors and instructors can help!
- It's possible to add the location of ipython to your Windows "PATH"—this link explains how.
The location to add is likely C:\Users\dodds\AppData\Local\Programs\Python\Python312\Scripts\—again, after replacing zdodds with your username. Ask!
- It's possible to add the location of ipython to your Windows "PATH"—this link explains how.
Next, you'll get more familiar with the command-line
The command-line
Everything you can do with the windows of your OS, you can do in a terminal at the command line. (Actually, you can do much more with the command line... .) For CS5, you'll need to know three terminal commands. We'll dedicate a short section to each. Here's a preview:- pwd short for print working directory. It prints your current location (folder).
- ls short for list (files). It prints all the files at your current location.
- cd short for change directory. It lets you move around your computer from folder to folder.
pwd
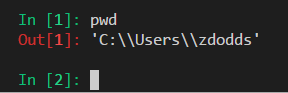
First, the prompt. The prompt is the bit of text on the left that's waiting for you to type something to the command line: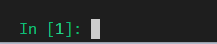 The pwd command is short for print working directory. It prints your current location (folder). Try it:
 You'll see the location at which your terminal and command line are
currently running. Unless your name is really similar to Zach's, your
results will be different!
You'll see the location at which your terminal and command line are
currently running. Unless your name is really similar to Zach's, your
results will be different! - Also, the formatting will be different if you're using a Mac or Linux—no problem at all
- Notice, too, that a next prompt has appeared, waiting for another command...
This folder, C:\Users\zdodds , is my "home directory." You'll likely be in your own home directory (and you'll see its full pathname—the name the OS uses to identify it uniquely).
Next, we'll see what's around with the ls command... .
ls the list command
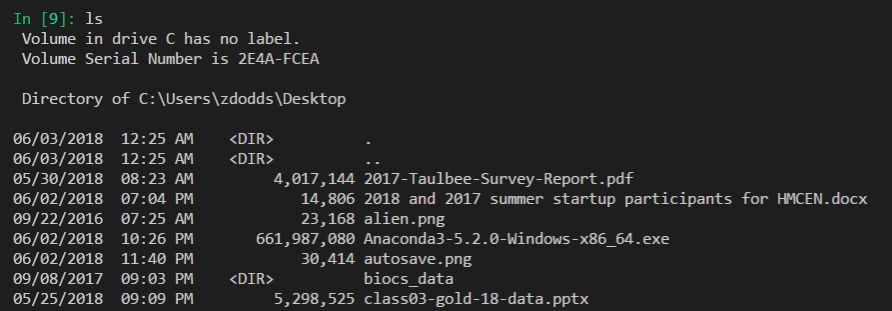
The ls command stands for list. Running ls lists everything in your current directory. For Zach, typing ls does this: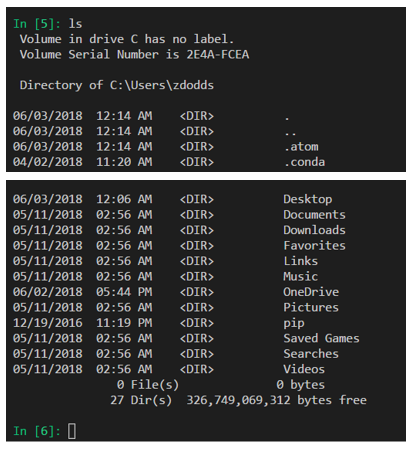 The output is a list of all of the files and (sub)folders in the
current directory. (Remember, "directory" and "folder" are the
same thing—the terms are used interchangeably).
Since this is Windows, you're seeing lots of the default subfolders in
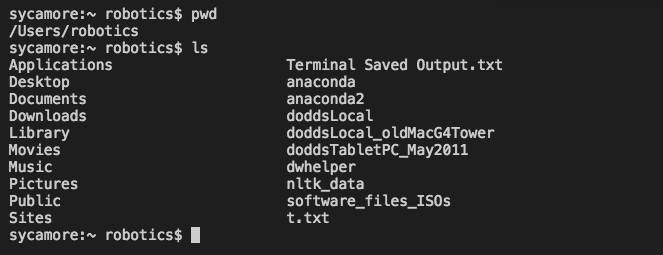
every Windows home directory, plus a few extra things. On a Mac, there will be some differences:
The output is a list of all of the files and (sub)folders in the
current directory. (Remember, "directory" and "folder" are the
same thing—the terms are used interchangeably).
Since this is Windows, you're seeing lots of the default subfolders in
every Windows home directory, plus a few extra things. On a Mac, there will be some differences:
 Try it to see
the list of names of the files and subfolders in your current
directory at the terminal.
Try it to see
the list of names of the files and subfolders in your current
directory at the terminal.
Next, you'll "move around" from directory to directory with cd... .
cd the change directory command
The cd command is the most important. It stands for change directory. The cd command lets you move from your current folder to other folders (directories) around your computer. To use it, you need to have a place to go! We'd recommend the Desktop... so, type cd Desktop No Windows Desktop? Try cd OneDrive first, then cd DesktopHere's an example:
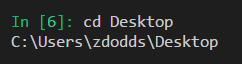 Not much happened...until you type pwd and see you're in a new place:
 Also, type ls and there could be a lot more files—well, depending on how cluttered your Desktop is! Try it! Here's a bit of mine:
 Your filage may vary!
Next, you'll move "up" within the directory structures...
cd .. moving "up" one folder
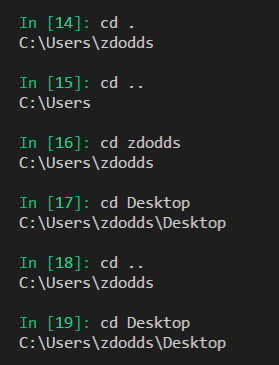
Ok! You cd'ed to the Desktop—how do you get back?! The special symbol of two periods in a row .. means "the next directory up." So, if you type cd .. and hit return, you will be back in the folder that contains your Desktop. Try it: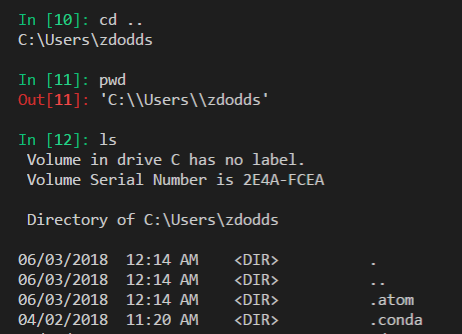 Then, try pwd and ls. You might notice that two of the directories listed are .. (the next directory "up") and . which refers to the current directory.
Practice!
Try these—at least for your setup. You'll find that Mac doesn't show the directory by default. Use pwd in that case!
That's it! You're set for the command line. There are very worthwhile shortcuts that make the command line much more efficient—more efficient than the drag-and-drop windows interface! For instance,
- Tab completion From your home directory, type cd Des and hit the tab key. The command line will try to complete your thoughts. Experienced (and lazy!) users nearly always tab-complete long names, instead of typing them. It's a great time-saver!
- Up-arrow and down-arrow The up-arrow and down-arrow keys remember everything you've done before. Enter a command once, and you can just up-arrow to get it back. You can also re-edit it (the left- and right-arrow keys will work) if you made a misteak...err, can I left-arrow that?
Ok! We're ready for Python. We'll use ipython next.
Python!
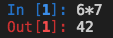
Python is a programming language, sometimes called a scripting language. Scripting languages have an interactive command line. In fact, you've been using the Python command line! Your ipython command line is a place to experiment with the Python language.- The "prompt" tells you that Python is ready to go.
- You might try 6*7 as a first computation at the prompt.
- Caution: deep wisdom may result!
 If everything is working so far, try some larger computations...
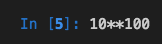
Try computing a googol (ten to the hundredth power). Google is (loosely) named for this number.
If everything is working so far, try some larger computations...
Try computing a googol (ten to the hundredth power). Google is (loosely) named for this number. - The power operator in Python is two asterisks **.
- So, at the prompt you would type
10**100
 All right... but can we go further! (Note: this is actually NOT a good idea) So, only if you're feeling reckless or angry at your computer, you can distress-or-crash ipython, and maybe your whole machine, by asking it to compute a googolplex, which is ten to the googol power:
 -

- It won't work. In fact, this is really not a good idea: you will likely have to kill and restart at least Python, and your computer might slow down frustratingly in the meantime.
- But, this does show how easy it is to reach a computer's numeric limits!
- IF for some reason you do decide to test this, you can cancel the calculation by pressing Ctrl-C (hold down "Ctrl" while typing the "C" key), or by killing the terminal with the x at its upper right, or by killing the whole VSCode application, or by holding down the power button of your machine, or unplugging both it and its battery...
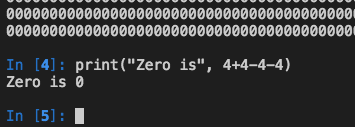
Continuing for the less reckless: now, copy-and-paste (or type) this line of Python code:
- print("Zero is", 4+4-4-4)
- You should see the output line: Zero is 0
- Notice that you used exactly four fours to create the numeric value 0 here. Here's ours:
 Extending this idea is the next—and primary—challenge of this week's lab!
First, we'll see how to use a file to hold our Python code, so that it can be submitted...
Running Python from a file
We already have a text editor open! So, in a new tab, create a new empty file (menus: File – New File) Then, into this new empty file paste (or type)
# CS5 Gold: Lab 0, Problem 1
# Filename: hw0pr1.py
# Name:
# Problem description: The four fours challenge!

from math import *

print("Zero is", 4+4-4-4)

print("sqrt(9) is", sqrt(9))  # This is "cheating" - there are no fours!
print("factorial(4) is", factorial(4))  # This may be helpful (you need four fours...)
Be sure to enter your name on the third line! Then save this file as hw0pr1.py on your Desktop.
- Later on, you can save your Python programs anywhere—it's best to keep them organized in folders.
- But for the purposes of this lab, we'll presume you've saved it to your Desktop.
- Also, you do need to type the .py extension
- Be careful not to put a space before or after the .py!
- When you save it with a .py extension (as it's called), you will see the Python source code colorize
- This is also called syntax highlighting
- If yours doesn't colorize, ask! Most people find those colorful cues super-helpful in understanding the structure of your programs. Ours:

- Windows users: please show all filename extensions!
- If you're on Windows, we ask that you turn on the view of file extensions (such as .py, .txt, .doc, and so on), at least for your semester in CS5.
- It can be confusing if Windows is hiding the extensions, because the .py or .txt extension you need might—or might not!—be there.
- If your Windows' folders are not showing the .py file extensions, please enable all file extensions by following the directions on this page.
- Running a file!
To run your file, go back over to (click in) the terminal.- Be sure you're running ipython (the prompt should be something like In [1]: so if you don't see that, type ipython again)
- Type ls (Windows or Mac) to see the files in the current directory
- Make sure your hw0pr1.py file is there!
- If not, use cd .. or cd Desktop or other combinations to get to the correct directory. Ask for help!
- At the ipython prompt, type run hw0pr1 (tab completion will work)
- This should run the file hw0pr1.py
- If all goes well, the program should run and you should see the output
- If not, please ask!
- Now, you can edit your file, save it, and hit up-arrow to re-run it. Awesome!
- Here's ours:

- Here's ours:
Your task: Four fours!
- The four fours challenge! Now, add several more lines similar to this one so that you compute at least 16 of the 21 values from 0 through 20 using exactly four fours (and no other numbers). (We ask for only 16 so that you can skip a couple if they give you trouble!) You may use any of Python's arithmetic operations:
- + addition
- - subtraction or negation
- * multiplication
- / division
- ( ) parentheses for grouping
- ** power
- As in the starter code, sqrt and factorial are also welcome!
- Here is the starter code again:
# CS5 Gold: Lab 0, Problem 1
# Filename: hw0pr1.py
# Name:
# Problem description: The four fours challenge!

from math import *

print("Zero is", 4+4-4-4)

print("sqrt(9) is", sqrt(9))  # This is "cheating" - there are no fours!
print("factorial(4) is", factorial(4))  # This may be helpful (you need four fours...)
- Results with decimals: 1.0, 2.0, etc. are totally OK!
- You may also use 44 or 4.4, each of which count as two fours,
- or .4, which counts as one four.
- or sqrt, for example sqrt(4) (or others)
- or factorial, for example factorial(4) (or others).
- Both sqrt and factorial are from Python's math library.
- Aside: the line from math import * is what imports that math library (i.e., makes it available)…put that line at the top of your file and you'll be able to use those functions to your heart's content.
- Here are what the results, but not the source code, will look like.
Remember you need only 16 of them:Zero is 0 One is 1 Two is 2 Three is 3 Four is 4 Five is 5 Six is 6 Seven is 7 Eight is 8 Nine is 9 Ten is 10 Eleven is 11 Twelve is 12 Thirteen is 13 Fourteen is 14 Fifteen is 15 Sixteen is 16 Seventeen is 17 Eighteen is 18 Nineteen is 19 Twenty is 20
- You may find the four fours game addicting, or frustrating, or both!
- Hint: the power operator is, well, powerful!
(Aside)
- There is a surprisingly long tradition of the four-fours puzzle. For example, here's an excerpt from a Scientific American article by Martin Gardner about it:

- Extra karma: feel free to go further than 20, if you'd like.
- We don't want to encourage it too much (there are other things to do!),
- But we're offering what we call "Prof. Su karma," for those who get addicted!
Submitting your hw0pr1.py file
- Once you have 16 results (all but 4)!, you're ready to submit your hw0pr1.py file.
- The name of your file matters! Please double-check that it's hw0pr1.py
- That's a one, 1, not a lower-case L
- To submit your file, you will want to go to the GradeScope assignment.
- Then, find your way to the submissions interface...
- and submit your hw0pr1.py file under hw0pr1 Troubles? Ask!
- You're done with the first problem and the lab!
- You probably didn't partner with anyone on this problem, so don't indicate a partner.
- If you do work with a partner on this or a future problem, there is a dialog to allow you to indicate a partner.
- You and your partner only need to submit one time: you will both then have the same file submitted.
- It will be graded together.
- Important! if you ever want to submit a better or newer version of a file before an assignment deadline, you can do so.
- All of the versions are kept, but only the last version is graded.
- You can download your file from the submission site, as well.