
Week 3 Lab: Sounds good!
[35 pts; individual or pair; filename: hw3pr1.py]Starting files to download:
Starter files for this problem:- We're back to VSCode + ipython for lab. This time, for audio processing...
- Most people will use the starter code hw3pr1.py Be sure to keep everything in the hw3pr1_s24 folder.
- The helper files, the sounds and csaudio.py will be needed
- The starter files are all in this zip archive:
First, cd to the hw3pr1_s24 directory and run the file...
Once you've gotten set up:- Download and unzip hw3pr1_s24, perhaps on your Desktop
- Start ipython
- cd to the hw3pr1_s24 folder
- run hw3pr1.py
Then, try playing a sound file ...
At the ipython prompt, run test()In [1]: test()Look down a little bit in the file. You will see a small function named test(). That functions plays one of the files. If all goes well, you should hear Darth Vader. This is not always true in the Star Wars universe, but for our purposes: ok!
Next, you'll remind yourself about list comprehensions... .
Head back at the top of the hw3pr1.py file.
Using list comprehensions (LCs)
Task #0: Run three_ize ...
Take a moment to remind yourself how list comprehensions work… Look over the three_ize function at a cell near the top of the hw3pr1.ipynb file:
def three_ize(L):
    """three_ize is the motto of the green CS 5 alien.
       It's also a function that accepts a list and
       returns a list of elements, each three times as large.
    """
    # This is an example of a list comprehension
    LC = [3 * x for x in L]
    return LC
This function "maps" the expression 3*x over the values x in the list L.
Try it out with
Example(s):
three_ize([13, 14, 15])Which should lead to this output below the cell:
[39, 42, 45]List comprehensions are a versatile syntax for mapping a function (or expression) across all elements of a list. If you feel good about list comprehensions, onward! (If you think more explanation or practice would be worthwhile, try our ListComprehension page.)
Function to write #1: scale
With the above function as your model, write a function scale with the following signature:def scale(L, scale_factor):where scale returns a list similar to L, except that each element has been multiplied by scale_factor. Example(s):
scale([70, 80, 420], 0.1)Which will create the following output:
[7.0, 8.0, 42.0]Use a list comprehension here.
Going further: index-based list comprehensions
Next, make sure this three_ize_by_index function is in your hw3pr1.py file. Look it over:
def three_ize_by_index(L):
    """three_ize_by_index has the same behavior as three_ize
       but it uses the INDEX of each element, instead of
       using the elements themselves--this is much more flexible!
    """
    # another example of a list comprehension
    N = len(L)
    LC = [3 * L[i] for i in range(N)]
    return LC
This function does exactly the same thing as
three_ize—it simply uses the index of each element
to do so.
That is, now the location of each element, named
i, is changing.
This index-based use of list comprehensions is even more flexible than the element-based style, as the next couple of questions will show.
Functions to write #2 and #3: add_2 and add_3
With the above index-based function as a guide, write a function add_2 with the following signature:def add_2(L, M):such that add_2 accepts two lists and returns a single list that is an element-by-element sum of the two arguments. If the arguments are different lengths, your add_2 should return a list that is as long as the shorter of the two. Just ignore or drop the extra elements from the longer list. Using min and len(L) and len(M) together is one way to do this. For example, the line
N = min(len(L), len(M)) # N is the min length!will assign the smaller of the lengths of L and M to N. Then, you can use range(N) instead of range(len(L)). Try it! You will want to use the index-based approach for this add_2 function. You might use three_ize_by_index as a starting point. Also, consider how this LC might help:
LC = [L[i] + M[i] for ... ]Here are two examples of add_2 in action:
add_2([10, 11, 12], [20, 25, 30])should return:
[30, 36, 42]
add_2([10, 11], [20, 25, 30])should return:
[30, 36]
Then, write the analogous three-argument function, add_3, with the following signature:
def add_3(L, M, P):where L, M, and P are all lists and add_3 returns the sum of all of them, but with only as many elements as the shortest among them has. The strategy will be very similar to add_2.
Function to write #4: add_scale_2
Next, write a function add_scale_2 with the following signature:def add_scale_2(L, M, L_scale, M_scale):such that add_scale_2 accepts two lists L and M and two floating-point numbers L_scale and M_scale. These stand for scale for L and scale for M, respectively. Then, add_scale_2 should return a single list that is an element-by-element sum of the two argument lists, each scaled (multiplied) by its respective floating-point value. If the argument lists are different lengths, your add_scale_2 should return a list that is as long as the shorter of the two. Again, just drop any extra elements. Example(s):
add_scale_2([10, 20, 30], [7, 8, 9], 0.1, 10)should return:
[71.0, 82.0, 93.0]
add_scale_2([10, 20, 30], [7, 8], 0.1, 10)should return:
[71.0, 82.0]This will not be too different from the previous examples!
A helper function: randomize
Next, take a look at this function in your hw3pr1.py file:
def randomize(x, chance_of_replacing):
    """Randomize accepts an original value, x
       and a fraction named chance_of_replacing.

       With a "chance_of_replacing" chance, it
       returns a random float from -32767 to 32767.

       Otherwise, it returns x (not replacing it).
    """
    r = random.uniform(0, 1)
    if r < chance_of_replacing:
        return random.uniform(-32768, 32767)
    else:
        return x
Read over the docstring and try it out.
There is nothing to do here except build an understanding of
what this function is doing: how often it returns the original
argument and how often it returns a random value.
That random value happens to always be within the amplitude range of a
sound's pressure samples.
Though it's random, here is a set of five real runs:
randomize(42, .5)
42

randomize(42, .5)
42

randomize(42, .5)
29209.30669767395

randomize(42, .5)
42

randomize(42, .5)
17751.221299744262
Function to write #5: replace_some
Next, write a function replace_some with the following signature:def replace_some(L, chance_of_replacing):such that replace_some accepts a list L and a floating-point value chance_of_replacing. Then, replace_some should independently replace—or not replace—each element in L, using the helper function randomize. Since this function is random, the runs below won't be replicated on your system, but try yours out to make sure it's working in a similar fashion. Example(s):
replace_some(range(40, 50), .5)  # replace about half  (hopefully the 42 remains!)
[40, 41, 42, -17461.09350529409, 44, -13989.513742241645, 46, -26247.774200304026, 48, 49]


replace_some(range(20, 30), .1)  # replace about a tenth  (but it's random: here 2 of them get replaced)
[20, 21, 16774.26240973895, 23, 24, 25, -18184.919872079583, 27, 28, 29]
To help you test, here are two assertions to paste into your cell. Note that second one says that the result is DIFFERENT from 42!
assert replace_some(range(40, 50), 0) == list(range(40, 50))
assert replace_some([42], 1.0) != [42]
In addition to providing practice with data and functions, the above examples will be helpful in creating functions that handle audio data in various ways... The replace_some function will allow you to add "static" (random values) to part of a sound, e.g., to make it sound "crackly."
Sound coding...
First things first: you may wish to again try out this function, which should already be in your hw3pr1.py file. You can run it with test():
# A function to make sure everything is working
def test():
    """A test function that plays swfaith.wav
       You'll need swfaith.wav in this folder.
    """
    return play('swfaith.wav')
For this to work, your Python will need to support sound (every version we've tested does).
If yours does not—no problem, simply work with a partner from
here on during this lab, or switch to one of the lab Macs.
Also, you'll need the swfaith.wav file in the folder in which hw3pr1.py is located. As long as you're in the original folder, all of this should be the case. If not, go grab all of those files that came with hw3pr1.py and copy them over
to whichever folder you're working in.
Before we go on, you'll need a bit of background information on audio
data. Then you'll have a chance to write a number of audio-processing
functions.
Background on representing audio information
What is inside an audio file? Depending on the format, the actual audio data might be encoded in many different ways. One of the most basic is known as pulse code modulation (PCM), in which the sound waves are sampled every so often and given values in the range -128 to 127 (if 1 byte per sound sample is used) or -32768 to 32767 (if there are 2 bytes for each sample). Wikipedia explains it here. The .wav file format encodes audio in basically this way, and the cross-platform program Audacity is an excellent tool for visualizing the individual PCM samples of an audio file. You don't need Audacity for this problem, but it runs on Windows and Macs and is fun to play around with if you'd like to. Audacity can also convert to .wav from .mp3 and many other formats. Last but not least, Audacity was created by Dominic Mazzoni, an HMC alum!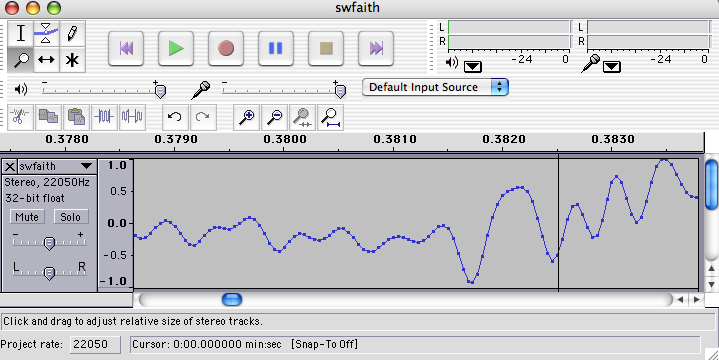
Getting started with sound
We present two examples to start acquiring and manipulating sound data. Try these:Sound example #1: changeSpeed
This function should already be in your file. Try it out!
In: changeSpeed("swfaith.wav", 44100)
If not, it's here for easy copy-and-paste:
#
# Our first example: the changeSpeed function
#

def changeSpeed(filename, newsr):
    """changeSpeed allows the user to change an audio file's speed.
       Arguments: filename, the name of the original file
                  newsr, the new sampling rate in samples per second
       Result: no return value, but
               this creates the sound file 'out.wav'
               and plays it
    """
    print("Playing the original sound...")
    play(filename)

    samps, sr = readwav(filename)   # get samps and sr from the file!

    print("The first 10 sound-pressure samples are\n", samps[:10])
    print("The number of samples per second is", sr)

    # we don't really need this next line, but for consistency...
    newsr = newsr             # from the input! (not needed, a reminder!)
    newsamps = samps          # same samples as before

    write_wav([newsamps, newsr], "out.wav") # write data to out.wav
    print("\nPlaying new sound...")
    play('out.wav')   # play the new file, 'out.wav'
What's inside the sound-processing code?
- The sound data is returned in two pieces by the call to read_wav, using the line samps, sr = read_wav(filename)
- readwav is returning two things:
- samps, a list of each air-pressure sample in the sound (samps has a lot of elements!)
- sr, an integer that is number-of-samples-to-play-per-second (usually 22050)
- readwav is returning two things:
- To reiterate, the variable samps is a large list of raw pressure samples (floats). Be careful about printing this list—it can be too big and can slow down or completely choke the terminal. Perhaps print samps[:10] instead.
- Also, after those lines, the variable sr is an integer that represents the sampling rate, i.e., the number of samples that should be played per second for normal-speed playback. It's usually 22050.
- Some printing happens, so that you can see information about these variables.
- For consistency, we use the variable newsamps to label the new sound data samples. In this case they're not changing at all, but in some later programs newsamps will be different from samps.
- Similarly, for consistency, we assign the new sampling rate with newsr = newsr . Again, this isn't really needed, but it's the same scaffolding for all our audio transformations.
- The code then uses the line write_wav([newsamps, newsr], "out.wav") to write the new sound data, newsamps and newsr , which must be put in a list, out to a file named out.wav, which will now appear in your hw3pr1 folder.
- To finish, the function plays that new file, which is now at the sampling rate of newsr.
Variations of these steps will be in all of the sound functions.
The next example shows how to create a new sound by changing the samples themselves. That is, newsamps will be different from samps (the old samples). Remember that samps will be a very large list of pressure values (≈50,000 elements).
Sound example #2: flipflop
This function should already be in your file. Again -- try it out!
In: flipflop("spam.wav") # or "swfaith.wav" or "swnotry.wav"
And, if it's not, it's also here for easy reference and copy-and-paste:
#
# Our second example, the flipflop function
#
def flipflop(filename):
    """flipflop swaps the halves of an audio file
       Argument: filename, the name of the original file
       Result: no return value, but
               this creates the sound file 'out.wav'
               and plays it
    """
    print("Playing the original sound...")
    play(filename)

    samps, sr = readwav(filename)   # get samps and sr from the file!

    print("The first 10 sound-pressure samples are\n", samps[:10])
    print("The number of samples per second is", sr)

    print("Computing new sound...")
    # this gets the midpoint and calls it x
    x = len(samps)//2
    newsamps = samps[x:] + samps[:x]
    newsr = sr               # same sr as before

    write_wav([newsamps, newsr], "out.wav") # write data to out.wav
    print("\nPlaying new sound...")
    play('out.wav')   # play the new file, 'out.wav'
Take a look at the middle part of this code, where the new sound samples are created from the old ones.
In this case, the newsamps are a "flipflopped" version of the old samps.
You may recognize this code as exactly the same as the flipside
problem from Lab 2.
As a result, the sound's second half is placed before its first half.
In building your audio-processing functions, use flipflop as a starting point; copy-and-paste-and-alter from flipflop is a great approach!
Sound function to write #1: reverse
Next, write a sound-handling function reverse with the following signature:def reverse(filename):such that reverse accepts a filename as did flipflop. Copy-and-paste flipflop to get started! Like flipflop, the sampling rate should not change, but the function should create a reversed set of sound samples and then handle them in the same way as the two examples above. That is, you'll want to write them to the file out.wav and then play that file. Remember that to reverse the list samps, you can write samps[::-1] in Python! Example(s):
reverse('swfaith.wav')  # redaV htraD sounds eerier but less intimidating
... lots of printing ...
Note that this reverse function won't need to use
any of the helper functions you wrote above—but the next few will!
Sound function to write #2: volume
Now, write a sound-handling function volume with the following signature:def volume(filename, scale_factor):such that volume accepts a filename as usual and a floating-point value scale_factor. Then, volume should handle the sound in the usual way, with the output file and played sound being scaled in amplitude (volume) by the scaling factor scale_factor. In other words, each sample should be multiplied by scale_factor. Example(s):
volume('swfaith.wav', .1)  # A calmer Darth...
... lots of printing ...

volume('swfaith.wav', 10.0)  # A caffeinated Darth!
... lots of printing ...
You'll notice that your hearing adjusts remarkably well to this function's changes in absolute volume, making the perceived effect less than you might expect.
You will also find that if you increase the volume too much, the sound becomes distorted, just as when an amplifier
is turned up to 11.
Sound function to write #3: static
Now, write a sound-handling function static with the following signature:def static(filename, probability_of_static):such that static accepts a filename (as usual) and a floating-point value probability_of_static, which you can assume will be between 0 and 1. Then, static should handle the sound in the usual way, with the output samples being replaced with a probability of probability_of_static. When they're replaced, the samples should simply be random values, uniformly chosen in the valid range from -32768 to 32767. Here, you should use the helper function replace_some that you wrote earlier in the lab. You won't need randomize, because replace_some already uses it! Example(s):
static('swfaith.wav', .05)  # Vader, driving into a tunnel
... lots of printing ...

static('swfaith.wav', .25)  # Vader on dial-up from a galaxy far, far away
... lots of printing ...
You might see how high you can increase the percentage of static until
the original is no longer discernible. People adapt less well to this
than to volume changes.
Sound function to write #4: overlay
Now, write a sound-handling function overlay with the following signature:def overlay(filename1, filename2):such that overlay accepts two filenames, and creates a new sound that overlays (combines) the two. The result should be as long as the shorter of the two. (Drop any extra samples, just as in add_scale_2.) Use your add_scale_2 helper function to assist with this! That way, you can adjust the relative loudness of the two input files. You are welcome, but certainly not required, to add more arguments to your overlay function so that you can change the relative volumes on the fly (or crop the sounds on the fly, which is a bit more ambitious). Remember that add_scale_2(samps1, samps2, 0.5, 0.5) must take lists (samps) as arguments—not filenames, which are simply strings! The samps are lists of the raw sound data. Example(s):
overlay('swfaith.wav', 'swnotry.wav')  # Vader vs. Yoda
... lots of printing ...
Extra: how could you modify overlay so that it doesn't
truncate the longer sound? Instead of truncating it, you could let it
continue against silence, or you could repeat the shorter sound...
The next function overlays a file with a shifted version of itself.
Sound function to write #5: echo
This one is more of a challenge... . Try writing a sound-handling function echo with the following signature:def echo(filename, time_delay):such that echo accepts a filename as usual and a floating-point value time_delay, which represents a number of seconds. Then, echo should handle the sound in the usual way, with the original sound being overlaid by a copy of itself shifted later in time by time_delay. To do the overlaying, you'll want to use add_scale_2, as before. To handle the time-shifting, notice that you can use the sampling rate to convert between the number of samples and time in seconds:
- For example, if time_delay is 0.1 and the sampling rate is 22050, then the number of samples to wait is 2205
- Similarly, if time_delay is 0.25 and the sampling rate is 44100, then the number of samples to wait is 11025
Example(s):
echo('swfaith.wav', .1)  # How many zeros would be needed in front?
... lots of printing ...
Sound Example #3: generating pure tones
The final provided example functions generate a pure sine-wave tone. Here is the code, though it should also be in the file:
# Helper function for generating pure tones
def gen_pure_tone(freq, seconds):
    """pure_tone returns the y-values of a sine wave
       whose frequency is freq Hertz.
       It returns nsamples values, taken once every 1/22050 of a second.
       Thus, the sampling rate is 22050 hertz.
       0.5 second (11025 samples) is probably enough.
    """
    sampling_rate = 22050
    nsamples = int(seconds*sampling_rate) # Rounds down
    # our frequency-scaling coefficient, f
    f = freq*2*math.pi/sampling_rate      # Converts from samples to Hz -- and in radians
    # our amplitude-scaling coefficient, a
    amp = 32767.0
    data_pair[0] = [amp*math.sin(f*n) for n in range(nsamples)]
    data_pair[1] = sampling_rate
    return data_pair    # this is the data-pair that write_wav needs...


def pure_tone(freq, time_in_seconds):
    """Generates and plays a pure tone of the given frequency."""
    print("Generating tone...")
    samps, sr = gen_pure_tone(freq, time_in_seconds)

    print("Writing out the sound data...")
    write_wav([samps, sr], "out.wav") # write data to out.wav

    print("Playing new sound...")
    return play('out.wav')
Look over this code and try it out to get a feel for what it does, though the math of the sine wave is not crucial.
Rather, the important details are that the function pure_tone takes a desired frequency freq and the span time_in_seconds. The mathematical details are then delegated to gen_pure_tone.
Example(s):
pure_tone(440, 0.5)  # 0.5 seconds of the concert-tuning A
... lots of printing ...
You can look up frequencies for other notes at at this Wikipedia page, among many others. Here's a small chart, as well:
 It's interesting to note that C0 is below the range of normal human
hearing (we can only heard down to about 20 Hz) but B8 leaves plenty
of room (most people below the age of 40 can hear to 20,000 Hz or
higher). Also, most pianos only go to A0 (28 Hz), but the
Bösendorfer Imperial Concert Grand has extra keys (colored
black) that go all the way down to C0. Just in case you need extra
bass!
It's interesting to note that C0 is below the range of normal human
hearing (we can only heard down to about 20 Hz) but B8 leaves plenty
of room (most people below the age of 40 can hear to 20,000 Hz or
higher). Also, most pianos only go to A0 (28 Hz), but the
Bösendorfer Imperial Concert Grand has extra keys (colored
black) that go all the way down to C0. Just in case you need extra
bass!
Sound function to write #6: chord
The final lab problem is to build on the above example to write a chord-creation function named chord, with the following signature:def chord(f1, f2, f3, time_in_seconds):such that chord accepts three floating-point frequencies f1, f2, and f3, along with a floating-point time_in_seconds. In the end, your chord function should create and play a three-note chord from those frequencies. You will want to get three sets of samps and sr from gen_pure_tone, e.g.,
samps1, sr1 = gen_pure_tone(f1, time_in_seconds) samps2, sr2 = gen_pure_tone(f2, time_in_seconds) samps3, sr3 = gen_pure_tone(f3, time_in_seconds)Then, you really need an add_scale_3 function, though we don't have that yet. But you can create it! (You could use add_scale2 and add_3 as starting points, but we'd recommend writing add_scale_3 on its own—not calling those other functions.)
Finally, you'll need to take the resulting samples-list (perhaps name it newsamps) and process it using code borrowed from the previous functions:
    new_sound_data = [newsamps, newsr]

    print("Writing out the new sound data...")
    write_wav(new_sound_data, "out.wav") # write data to out.wav

    print("Playing new sound...")
    return play('out.wav')
Example(s):
chord(440.000, 523.251, 659.255, 1.0)   # A minor chord
... lots of printing ...
Does your chord sound awful? Your chord should sound pretty, just like the sound from
gen_pure_tone or like three flutes playing together.
Remember what happened when you used volume to increase the
volume too much? gen_pure_tone produces a tone that is at
maximum volume. When you combine two (or three) such tones, their
peak volumes add together—and the result is too loud for the
computer to handle, producing distortion. Think about how you could
adjust for this phenomenon without simply making the chord too
quiet. In other words: - You'll want to keep the overall amplitude at 1.0.
- Since the amplitude of each original is 1.0, you'll need to use fractional scale values to make sure the overall amplitude of the summed waves stays at 1.0 or less.
- If the wave exceeds 1.0 in amplitude, it will be "clipped" by the speakers, which will sound like loud static overlaying the sound (or just sound horrible).
But what about creating a C minor 7th (or augmented) chord? Indeed, you might want to create larger chords with arbitrarily many notes...or other unusual/odd/interesting/inspired/disturbing algorithmically-generated sound effects. We certainly encourage you to try things out! It's not terribly hard to write something that plays real music!
Congratulations! For this lab, you're ready to submit your hw3pr1.py code. However, you don't need to submit any of the other files than hw3pr1.py. Here's a link to the GradeScope assignment, be sure to submit by Tuesday, February 13 at 22:22:22 (22 seconds after 10:22 pm).
You might look at the next problems on the appropriate assignment page: Or, you can simply bring down the curtain on this lab and head out towards an entirely different encore!