This brief tutorial explains the basics of camera control in OpenGL. You can find far more sophisticated algorithms online, but this technique should satisfy your needs for CS121.
To start, download the source files here. Create a visual studio project and insert the source files. Build the project and run the executable. The program draws a set of coordinate axis centered at the origin. Use the arrow keys to rotate the viewpoint. Use + and - keys to zoom in and out.
You can also change the center by pressing the c key, then answering the prompt for the x,y, and z coordinates of the center. When the center is not the origin, the program draws two set of axis; one at the origin (white) and one at the center (cyan).
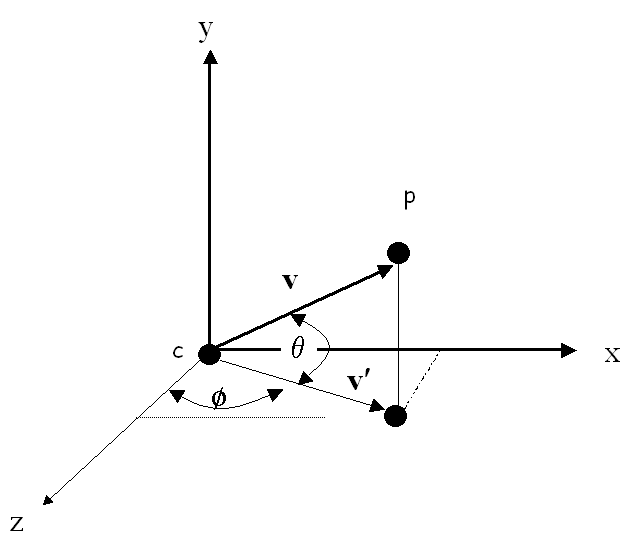
OpenGL requires that we specify the viewpoint position, p, the center of attention, c, and the "up" direction. The center of attention is initially the origin but can be reset by the user as described above. The up vector is always set to (0,1,0). The current viewpoint is specified by angles θ and φ, measured in degrees as illustrated in the following figure and explained in the subsequent paragraph.
Let v be the vector from the center c to the viewpoint p. The length of v can be controlled by the user with the + and - keys. The user can also control the angle, θ, between v and x-z plane with the up and down arrows. In order to prevent v from coinciding with our up vector, we constrain θ to be between -85 and 85 degrees. Let v' be the projection of v on the x-z plane. Then v' makes an angle φ with the z axis. The user change change φ with the right and left arrow keys.
The computation of p based on d=||v||, θ, and φ can be found in the display function of the demo.