CS155 Computer Graphics
Snowman Lab - Part 1
In this lab you'll learn about specifying 3D objects for the ray tracer. You should work in pairs.
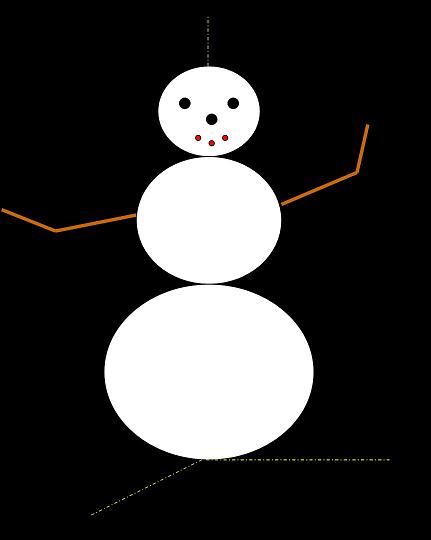
Your goal in part 1 of the lab is to build a model of a snowman. The snowman should have a head, middle, and bottom,
two eyes, and a nose. (After you've finished the basic snowman you can consider adding other parts.)
It should be centered on the y-axis, sit on the x-z plane, and face in the +z direction.
It should be 10 units tall.
The basic building block you'll use is a sphere, which is specified by its center and radius.
-
Start by sketching your snowman on paper.
-
Next identify the sizes of the various parts; i.e. the radii of the various spheres.
-
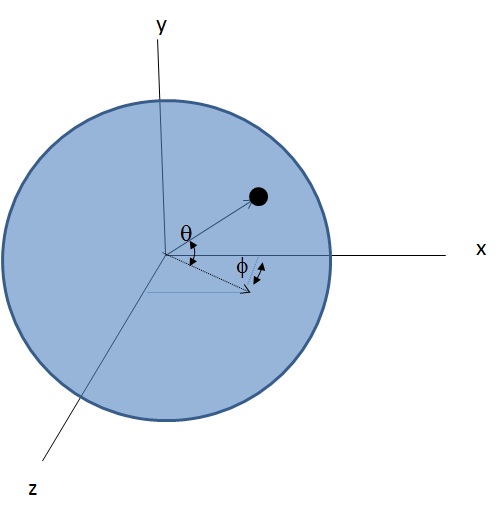
Next determine the centers of the spheres. For the eyes and nose positions, you'll need to determine the angles θ and φ (see image below) and their
cosines/sines. You can approximate cos(θ)=1-θ2/2! and sin(θ)=θ - θ3/3!, where θ is in radians.
-
Below is a sample rayfile. Copy and paste into a text file. Save as snowman.ray. Windows will add a .txt extension, which needs to be eliminated.
Open the control panel (from the start menu) then click on Appearance and Personalization and then Folder Options. Under the View tab you can
de-select Hide file extension. Now you can rename the file, eliminating the .txt extension.
#version HMCCS155FALL2002
#camera
0.0     0.0     10.0 	// position
0.0    	0.0	-1.0 	// facing
0.0     1.0     0.0 	// up
20.0                	// wholeHeightAngle

#background
0.0  	0.0  	0.5

#ambient
1.0	1.0	1.0 	//intensity


#material -n white  --
1.0     1.0     0.6 	// ambient
0.0     0.0     0.0 	// diffuse
0.0     0.0     0.0 	// specular
0.0     0.0     0.0 	// emissive
0.0     0.0         	// kspec, ktrans
1.0                	// refind


#material -n black  --
0.0     0.0     0.0 	// ambient
0.0     0.0     0.0 	// diffuse
0.0     0.0     0.0 	// specular
0.0     0.0     0.0 	// emissive
0.0     0.0         	// kspec, ktrans
1.0                	// refind


#sphere -m white --
0.0     0.0     -10.0 	// position
6.0

                	// radius
#rayfile_end
-
In this ray file the camera is positioned at (0,0,10), pointed down the -z axis, with up in the y direction.
The height angle of the view volume is 20 degrees (i.e. the half height angle is 10 degrees). The background color is set to blue. The scene has ambient light and defines white and
black materials. (We'll talk more about lights and materials next week.) There is currently one object in the scene; a sphere
of radius 6 centered at (0,0,-10). Replace the existing sphere with the ones you've determined
will create your snowman. Each one will be specified with three lines:
#sphere -m c 		// sphere with color c
cx, cy, cz		// position with center cx,cy,cz
r			// radius r
where c is one of the specified materials, white or black. Double slash delimits a comment. You can use white space between sphere definitions to
make the file more readable.
-
Now download a sample executable of the ray tracer, run it, load the ray file, and have it rendered.
(Note: Initially you will see an image of the scene rendered with OpenGL. To see the ray traced version you need to render it.
For this example there won't be much difference. But this will be important when you start writing your own code!)
-
You will not be able to see the entire snowman with the current camera settings. You can change the angle of the view volume, move your snowman, or move your camera in order
to capture the whole snowman.
Do whatever you think best.