Computer Science 60
Principles of Computer Science
Fall 2011
Assignment 13: Extra Credit Assignment: Seam Carving!
Due Sunday, December 18
[up to +50 (or even +100) points out of 0]this may be done individually or in pairs
This extra-credit project offers a chance to implement the Seam Carving algorithm in a Java applet.
Note that an extra-credit survey is also available from this link. To get credit, take the survey and then submit "I took the survey." under the submission system's hw 13 in survey.txt.
Seam carving was first published in this paper by S. Avidan and A. Shamir in 2007. It's a relatively accessible paper, and you'll want to have this link available to refer to it as you implement seam carving. The approach uses dynamic programming in order to quickly find the lowest-cost seam from top to bottom or from left to right in an image. Repeated removal of seams allows for image-aware resizing to any smaller size. (The paper offers a seam-insertion algorithm for resizing to larger sizes, too, though that won't be our first priority here.)
This assignment starts with these applet-based starter files:
SeamCarving.zip
These behaviors are to show how you can access - and change -
the pixels from a BufferedImage, which is a class
you'll want to use throughout your Seam Carver.
The mechanism for assigning pixel values may not be entirely clear from
the code (in mouseClicked):
bimage.setRGB(x, y, rgb);
// this depends on prior declarations (as int)
// for the variables red, green, blue, and alpha:

// Setting a pixel
red = 0;
green = 255;
blue = 0;
alpha = 255;
// this next line packs these four values into a single integer...
rgb = (alpha << 24) | (red << 16) | (green << 8) | (red);
// that integer (rgb) is of the format needed by setRGB
bimage.setRGB(x, y, rgb);
What to do
This project has several parts, each worth some of the points available:
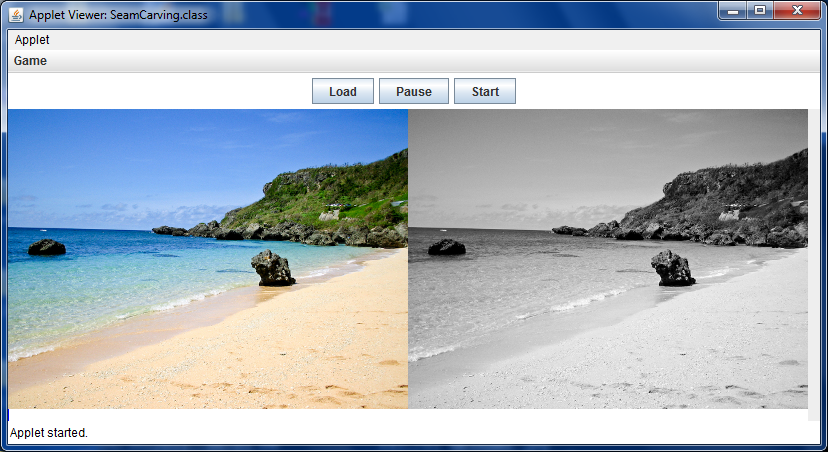
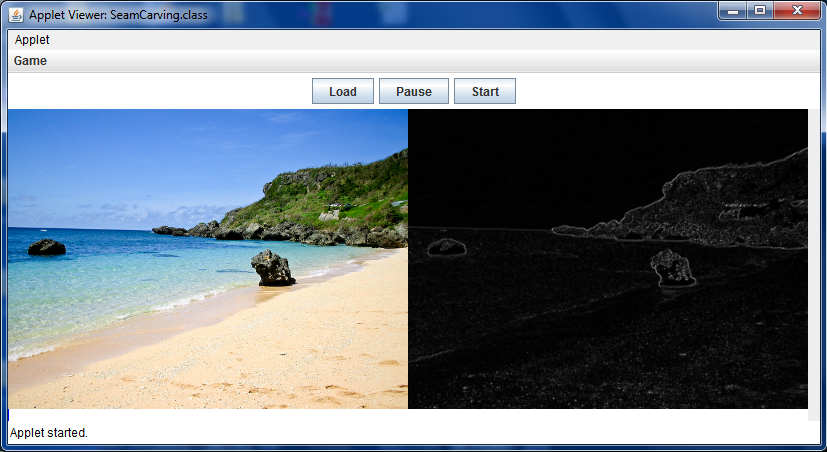
- [10 points] for computing the "edge energy image"
and providing a way for the user to show this image. The
paper writes the edge energy at each pixel using the
sum of the absolute value of two derivatives. Fair enough, but
all this means in practice is something like this:
e(r,c) = ( |i(r+1,c)-i(r,c)| // southern derivative + |i(r-1,c)-i(r,c)| // northern derivative + |i(r,c-1)-i(r,c)| // western derivative + |i(r,c+1)-i(r,c)| // eastern derivative ) / 4.0;i(r,c) = (red(r,c) + green(r,c) + blue(r,c))/3.0;
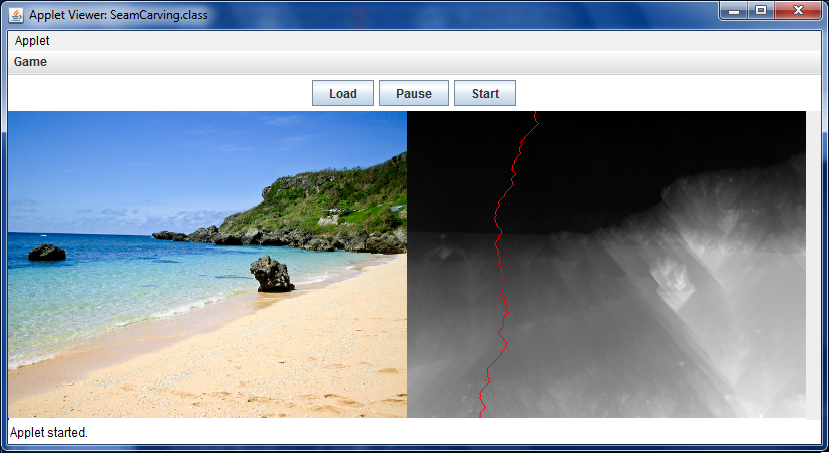
- [20 points] for computing and displaying the
dynamic-programming-based "energy-sum" image (as shown
in the paper and in class) and for finding the lowest-importance
seam, which should be highlighed in some distinct color, e.g.,
red. To display this image, you may want to add a new
button to the applet (or use a keystroke - the interface is
up to you). An image:
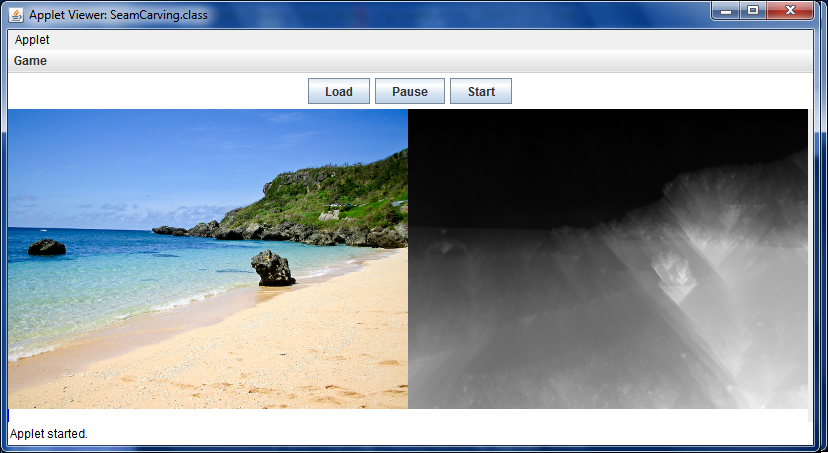
Watch out! as the values can get (much) larger than 255. If you don't account for this (and then pack up your pixels in the usual way), the bits will "spill over" into other channels, creating a color image like this:
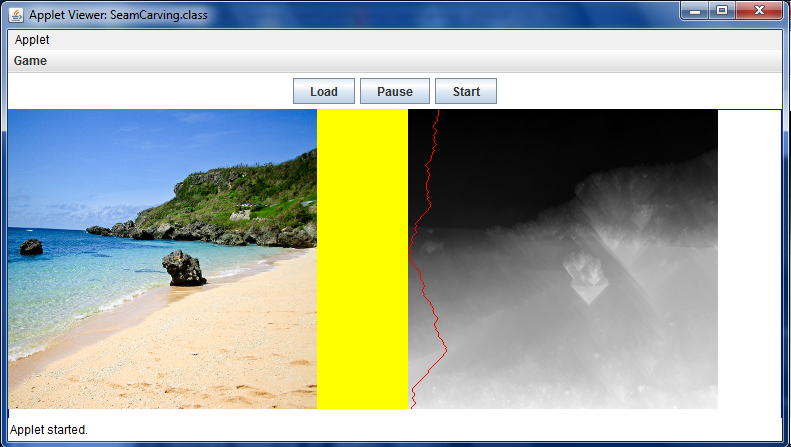
To avoid this, be sure to scale every value in your accumulated energy table by multiplying by 255.0/maxval before converting to an int and placing them into the grayscale image. - [20 points] for actual seam-carving. That is,
for removing the minimum-importance (vertical) seam of pixels and
re-displaying the resulting image. I did this by
moving the other pixels over appropriately and adding
a final row of white pixels (to blend into the background).
There should be a way for a user to keep seam-carving,
so that the image continues to become narrower. Here's our first seam and
an image after many more seams have been carved:
- [25 points] are available for basic improvements
to the user-interface and capabilities, e.g., adding buttons
or messages for displaying the different parts of the
process listed above. You're encouraged to design an interface
of your own, but as a guide to the kinds of capabilities
you might include, each of the following features (or other
equivalent ones) would be worth 5 points. Substitutions
are welcome!
- A button to revert back to the original image
- Buttons to toggle between the edge-image without seam and the edge-image with seam
- Similarly, buttons or other elements to toggle between the energy-sum-image without seam and the energy-sum-image with seam
- A pull-down menu (or button) to rotate among different images that are provided (like okinawa.jpg - add one or more of your own).
- A checkbox or other interface component to choose between vertical and horizontal seam-carving.
- [25 points] are also available for cool "above and
beyond" features or creative extensions. Again, this is
completely up to you, but here are a couple of ideas for
possibilities:
- for example, full credit on this part would be available if the user could select rectangles of pixels that would guide the seam carving, either always being carved or always being avoided (to obtain the kinds of results we saw in class)
- similarly, seam-insertion as described in the paper would earn full-credit on this part
Submission
To submit this assignment, zip up your SeamCarving folder and upload it as SeamCarving.zip under week 13 on the submission site.