The Handy Board runs Interactive C. This appears to be a very viable language for this sort of development, particularly in contrast with TEA, the C-like language on which our previous project depended.
Within an hour of starting this project we had progressed farther than we ever
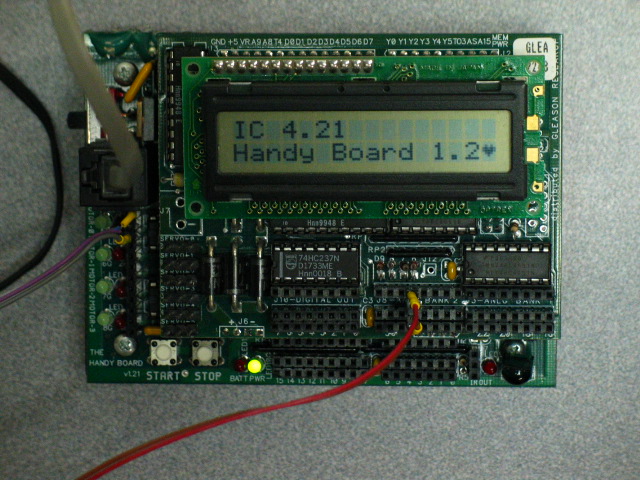
did with the palm robot project; within minutes we had communication with the
board:
The Handy Board runs Interactive C. This appears to be a very viable language for this sort of
development, particularly in contrast with TEA, the C-like language on which our
previous project depended.
From the beginning, we were able to easily got the robot to work. The Linux program we used had extremely good directions. It included a photo with every step of the wizard as shown here:
Within minutes of reading the instructions we had motors working. This code was all it took: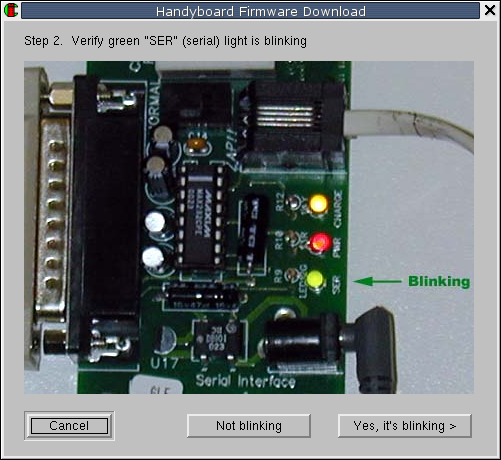
The result is shown in this video.fd(0); // Turn the motor on off(0);//turn the motor off.
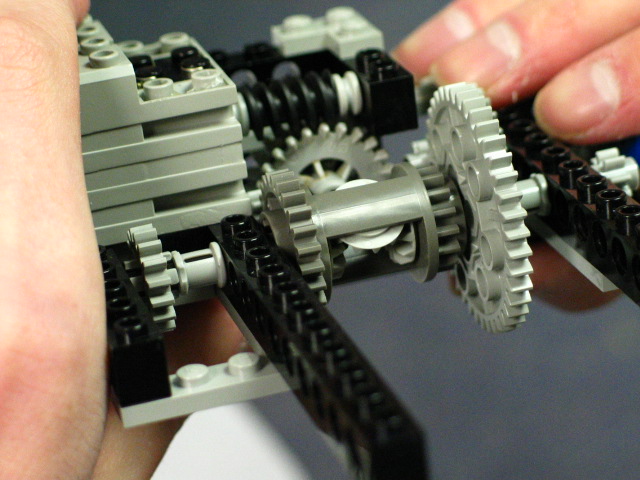
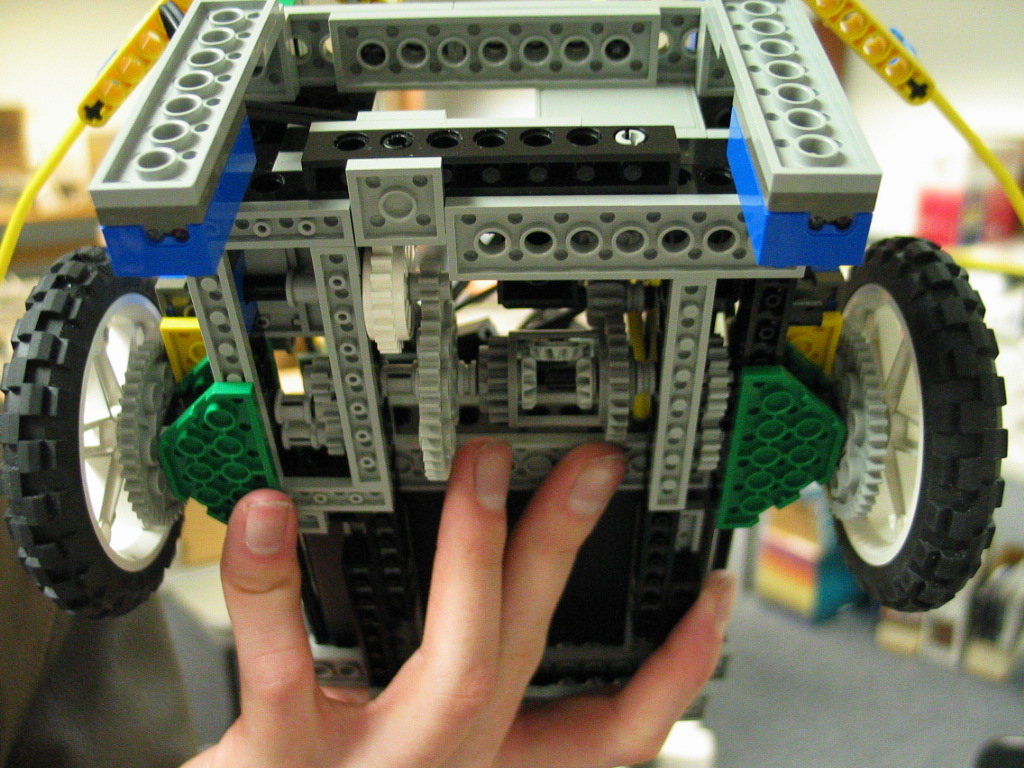
The problem in general with basic DC motors is that given the same voltage, they will run at slightly different speeds. If you use two motors to drive two wheels of a robot to give you differential steering, you will find that if you supply the same voltage to both motors, your robot will veer off to one side. Thus, the chassis design we used has one motor to drive both wheels. The wheels are separated by a differential; that differential is connected to a steering motor such that the wheels will turn in sync if the steering motor is stopped, or a turning differential proportional to the steering motor speed will be added to the wheel axles. In the original design, a pair of gears was misaligned such that moving in reverse would cause them to slip, and an attempt to fix that was included in this version.
A closeup of the differential:
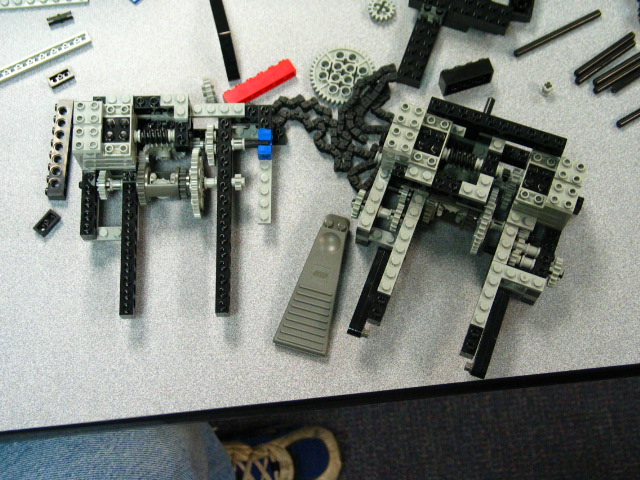
The original chassis (right) and the incomplete improved version (left):
At one point we considered using a third motor to collect the debris on the table, not unlike brushes on a vacuum. While the results were entertaining, the idea proved to be impractical for the time being. In the process of testing this we had the brush motor hooked up to the turning motor's proportional control. Thus, when the robot was trying to turn, the brush would spin, but the wheels could be turned by hand and would act as a throttle for the brush. Simple things amuse simple minds; all minds are simple at 4AM.
We discovered that not all of the Lego rotation sensors are created equal. In particular, we had originally thought that they were 16 ticks/revolution, but then it turned out that one of ours was reading 8 and the other was reading about 6. This became very problematic when we tried to determine where the robot was.
We implemented a process that ran through the Handyboard's multitasking extensions in Interactive C to keep an x-y position based on frequent updates of the robot's wheel encoders. Oddly, going in a straight line gave somewhat random, cyclical results for the x and y values. We eventually determined that the heading was drifting due to the difference in encoder resolution, making the robot think it was turning in circles instead of driving straight.
The Lego rotation and light sensors give analog readings in a format that is not readily understandable by all the Handyboard analog inputs. Specifically, they need a 10K pullup resistor instead of the 47K resistor of the rest of the Handyboard. The Handyboard expansion unit provides 4 Lego-compatible sensor ports, to which we hooked up our light and angle sensors.
Interestingly, this library uses a very different way of accessing these
4 sensor values. Rather than call analog(port_num), the values are
“magically” available as the global variables lego0–lego3, and updated at 250Hz.
This made reading from these ports syntactically different from handling
any other sensor, but it worked just fine.
To make the Lego light sensors work with the Handy Board an
additional library was needed. The library is comes zipped as
hbexplib.zip. The relevant files and must be included with
#use and they must be in the same directory as the source that
includes it. The file we used was explego.icb so our code has the
line #use explego.icb. Here are the light sensors:
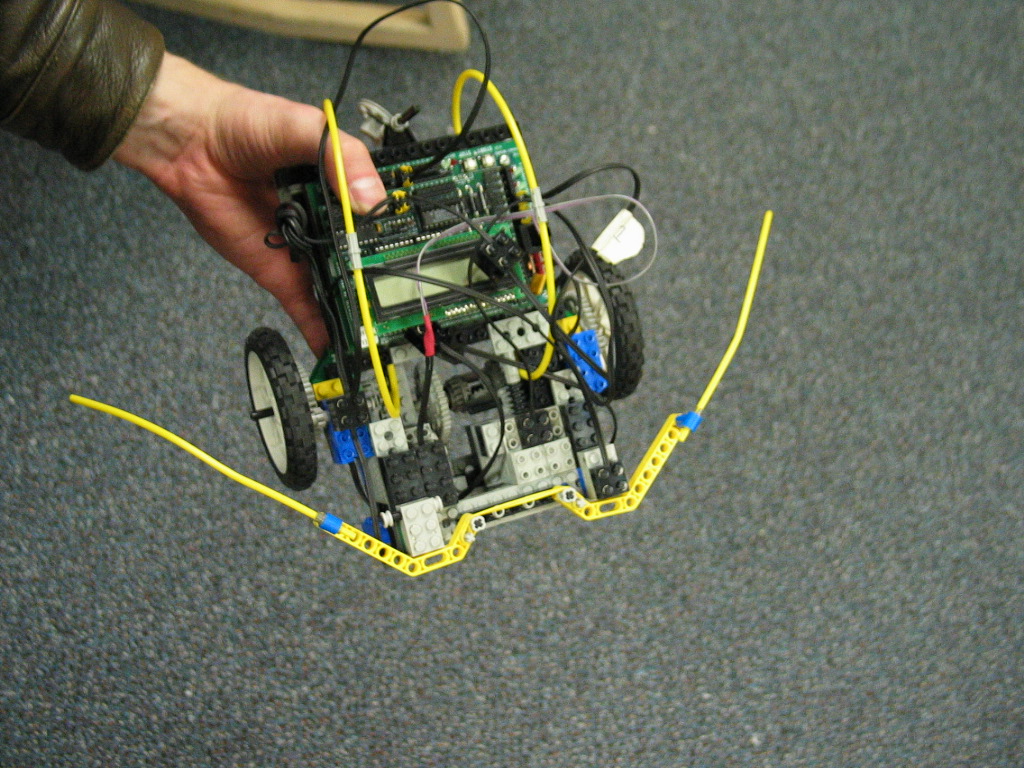
The edge following code worked perfectly on the very first try — not a
common occurrence in robotics. Unfortunately the bump sensors, even with
whiskers attached, did not have the necessary characteristics to follow
walls. The bump sensors would catch on the wall, then the robot would try to
turn away but get stuck or even push itself harder against the wall. IR range
finders or sonar would probably work just fine.
We discovered that initializing global variables apparently crashes the interactive C program running on Windows; the error message is not at all useful. Also, the lack of certain Lego pieces hampered our ability to build a stable base.
The Handy Board was generally a joy to use. Essentially none of our problems were due to it. This is in contrast with our previous with the BrainStem on a Palm-powered robot where all of our problems were with the architecture.
Links: kipr.org and botball.org