Run JAGS on Hopper
Set up R and JAGS in your own account, run a small Bayesian model, and download the results. No administrator installation is needed for this workflow.
Commands marked Your computer run in macOS Terminal, Linux Terminal, or Windows PowerShell. Commands marked Hopper run after SSH login. The server name in a prompt such as [you@hopper ~]$ tells you where you are.
Quick start
If you already have Conda and a Hopper account, download the folder in Step 1, then run this from the extracted folder. Run bash setup.sh first only if you have not installed the JAGS environment.
Hopper
source ./activate.sh
bash submit.sh
On the first submission, enter your authorized Slurm account and partition when prompted. The helper remembers them in this project folder. Then check the job:
Hopper
bash status.shNew to Hopper? Follow the steps below. Use your own account, copy one command block at a time, and stop if a command fails. Model fitting belongs in a scheduled job, not on the login node.
1. Connect and download
Connect to your college VPN. Open Terminal or PowerShell and replace YOUR_USERNAME with your actual Hopper username.
Your computer
ssh YOUR_USERNAME@hopper.mckenna.eduEnter your password; nothing appears as you type.
First connection: check the server fingerprint
A first connection may ask whether to trust the server. Find the algorithm named by your SSH prompt below and compare its SHA256 fingerprint before typing yes. A changed key or a mismatch needs confirmation from Hopper support.
| Algorithm | SHA256 fingerprint |
|---|---|
| ED25519 | SHA256:jt8F40xEaVV+ITKozzR5jFrfJTe7O5HhQg9vS8w73dU |
| ECDSA | SHA256:o32TmYIa3Qxl8KNcD8dLc5QwV75oA8fvIqiTbZ+H3v4 |
| RSA | SHA256:GpcwMVW4H/Mo664eVBwb8x5aYzrm6CtE+BAyP00QPOY |
These public fingerprints were read on October 5, 2026 through an established, authenticated connection to hopper.mckenna.edu. They are a dated observation, not an administrator-issued key-rotation notice.
Once you are logged in, download and extract the starter directly onto Hopper:
Hopper
mkdir -p "$HOME/jags-workshop"
cd "$HOME/jags-workshop"
curl -fL -O https://www.cs.hmc.edu/~ndodds/guides/hopper-jags/hopper-jags-starter.zip
unzip -n hopper-jags-starter.zip
cd hopper-jags-starter
unzip -n keeps any files already present. To use a later starter release, extract it into a new folder so it does not mix with your edited model. If unzip is unavailable, extract the ZIP on your computer and transfer the folder with scp.
Download starter ZIP 340 KB Same ZIP as the button at the top of this page.
Files in the download
| File | Purpose |
|---|---|
setup.sh, install-jagsUI.R | Install the tested software versions |
activate.sh | Activate the environment after each login |
hello.R, run.sbatch | Example model and Slurm job script |
submit.sh, status.sh | Submit jobs and check their results |
research-template.R | Starting structure for your own model |
guide.html, README.md | Offline instructions |
validated-demo.pdf | Reference plots |
VALIDATION.txt | What was tested and what remains untested |
2. Check your account
You log in to a login node to edit files and submit work. Slurm, the scheduler, sends jobs to compute nodes. A partition is a queue with resource and time limits. A Slurm account identifies your allocation; it may differ from your username or lab group.
Hopper
hostname
uname -m
printf 'Shell: %s\n' "$SHELL"
command -v conda
module list
sinfo -s
sacctmgr -nP show assoc where user="$USER" format=Account,Partition
Expect hopper in the hostname, x86_64 for the architecture, and a Bash shell such as /bin/bash. If you use another shell, start bash for these instructions. No output from command -v conda simply means Conda is not loaded. If an R module is listed, run module unload R; this guide uses the environment's R.
An account row such as standard|debug allows that account in debug. A row such as standard| has no partition-specific restriction in that association; other partition and QOS access rules can still apply. Use sinfo -s to see queue names and limits, and ask support if your authorized queue is unclear. An empty account listing also needs support.
Keep your account name handy for the first submission. The short demo uses two cores, 2 GB RAM, and five minutes. Hopper's observed debug limit is one hour; main allows up to three days, subject to account policy. Check your quota if space is limited.
3. Make Conda available
Choose the path that matches your account. A working Miniconda, Miniforge, or Anaconda installation is enough.
Conda already works
Hopper
conda --version
source "$(conda info --base)/etc/profile.d/conda.sh"
Continue to Step 4.
Conda is installed but not loaded
Look for an installation:
Hopper
ls -d "$HOME/miniconda3" "$HOME/miniforge3" "$HOME/anaconda3" 2>/dev/nullLoad the one you found. For miniconda3, use:
Hopper
source "$HOME/miniconda3/etc/profile.d/conda.sh"
conda --version
Substitute miniforge3 or anaconda3 if needed, then continue to Step 4. If no installation exists, follow the next section.
Install Miniforge if needed
Run these Linux commands on Hopper, even if your own computer is a Mac or Windows machine. They download a versioned installer from the official Miniforge project and verify its checksum.
Hopper
mkdir -p "$HOME/software-installers"
cd "$HOME/software-installers"
curl -fL -O https://github.com/conda-forge/miniforge/releases/download/26.7.2-0/Miniforge3-26.7.2-0-Linux-x86_64.sh
curl -fL -O https://github.com/conda-forge/miniforge/releases/download/26.7.2-0/Miniforge3-26.7.2-0-Linux-x86_64.sh.sha256
sha256sum -c Miniforge3-26.7.2-0-Linux-x86_64.sh.sha256
Proceed only if the result is OK:
./Miniforge3-26.7.2-0-Linux-x86_64.sh: OKHopper
bash Miniforge3-26.7.2-0-Linux-x86_64.shPress Enter to review the license, type yes if you accept it, press Enter for the default location, then answer no to shell initialization. If the destination already exists, load that installation instead of replacing it.
When installation finishes and your shell prompt returns:
Hopper
source "$HOME/miniforge3/etc/profile.d/conda.sh"
conda --version
cd "$HOME/jags-workshop/hopper-jags-starter"
4. Install and activate JAGS
For a new environment, run the setup once:
Hopper
cd "$HOME/jags-workshop/hopper-jags-starter"
bash setup.sh
It installs R, JAGS, and their dependencies from conda-forge in $HOME/.conda/envs/jags, then installs jagsUI from CRAN. It accepts the Conda package plan automatically. If the environment already exists, skip setup and verify it below.
Everyone activates and verifies:
Hopper
source ./activate.sh
command -v R Rscript
Rscript --vanilla -e 'cat(R.version.string,"\n"); library(rjags); library(jagsUI); print(jags.version()); print(packageVersion("jagsUI"))'
R and Rscript should resolve inside .conda/envs/jags/bin. Look for R 4.5.3, JAGS 4.3.2, and jagsUI 1.6.3. The traceplot “masked” message is normal: two packages provide a function with that name.
The helper stores your Conda path in conda-base.txt. After each new login, return to the folder and run source ./activate.sh. Scheduled jobs use the same helper.
5. Submit your first model
Hopper
bash submit.shThe first time, enter your Slurm account and an authorized partition—usually debug for this short test. After Slurm accepts the job, the helper saves these values in .slurm-settings and the job ID in last-job-id.txt. They survive reconnects. Later submissions show the saved account and partition before submitting.
Hopper
bash status.shA pending job is waiting for resources; a running job needs more time. Run the status command again later. Success includes both the PASS line and a completed job with exit code 0:0:
PASS: parallel JAGS sampling completed successfully.
JobID             State ExitCode
366462        COMPLETED      0:0
366462.batch  COMPLETED      0:0
This is an excerpt from a successful run; your job ID will differ. The job writes hello-fit.rds, hello-summary.csv, hello-diagnostics.pdf, and hello-session.txt. Email your job ID and PASS line to ndodds@g.hmc.edu.
To change queues, use bash submit.sh --partition main if you are authorized for main. To enter account and partition again, use bash submit.sh --reset. Resource overrides are not saved: each run starts with the defaults in run.sbatch unless you supply options.
Finish one run before submitting another in the same folder. Re-running replaces the named result files; use project copies to keep experiments separate.
6. Read the results
Open another terminal on your computer and change into a folder where you want the results. Replace YOUR_USERNAME:
Your computer
scp 'YOUR_USERNAME@hopper.mckenna.edu:~/jags-workshop/hopper-jags-starter/hello-*' .Open the CSV and PDF. The reference PDF shows the same example.
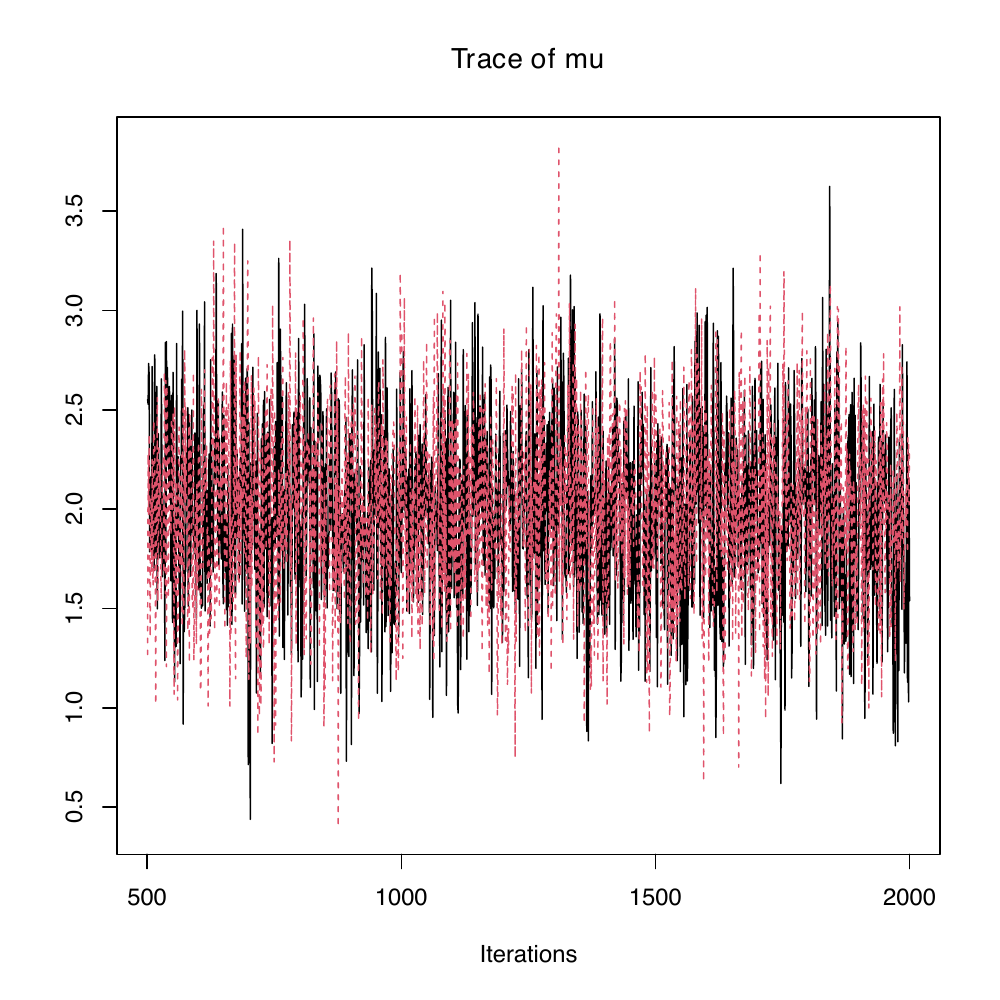
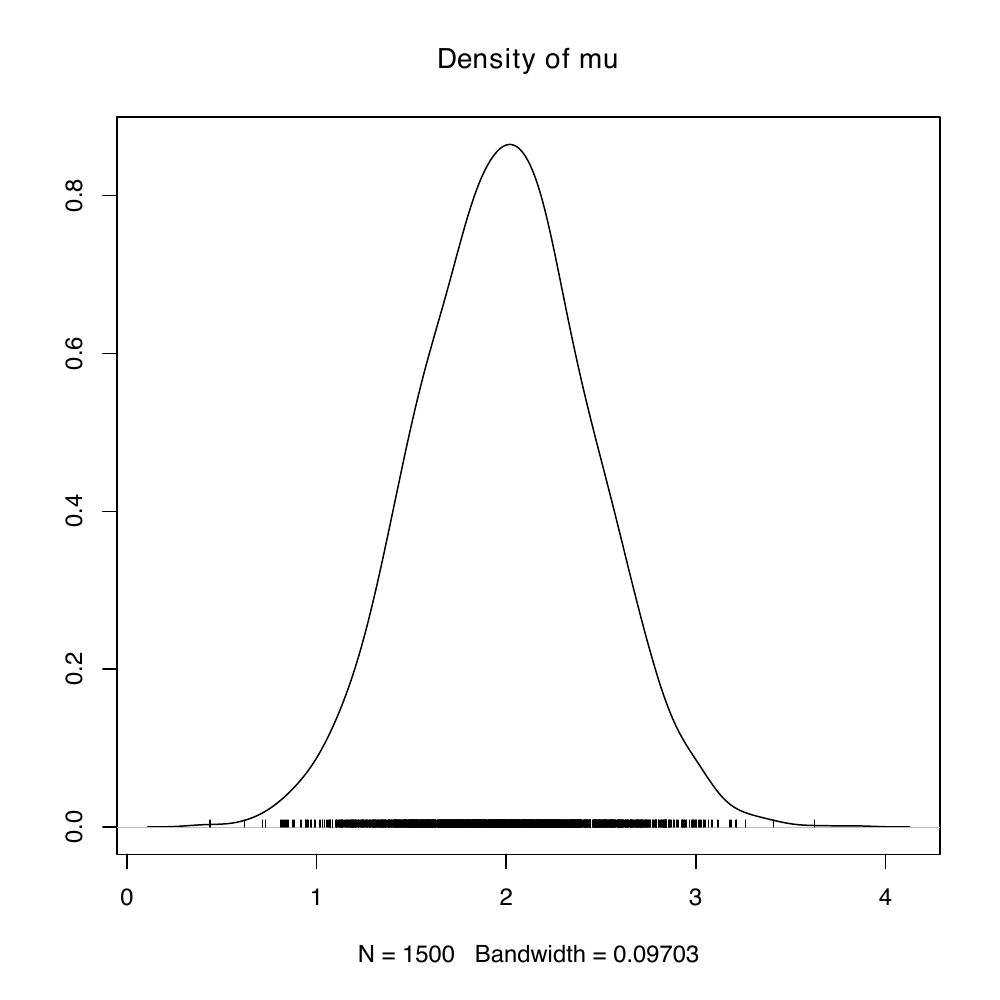
Understand the numerical check
The observations are 1.8, 2.1, 2.0, 1.9, 2.2. Observation standard deviation is fixed at 1. The prior for the mean has mean 0 and standard deviation 10. JAGS uses precision (1 divided by variance), so the model uses precisions 1 and 0.01.
The analytic posterior mean is 10 / 5.01 ≈ 1.996, with standard deviation sqrt(1 / 5.01) ≈ 0.447. The check requires finite draws and a sampled mean within 0.15 of the analytic mean. It keeps 1,500 samples per chain, for 3,000 total; 500 adaptation iterations occur before the main sampling iterations.
This is a software check. A passing demo or Rhat near 1 does not validate a different model's assumptions or establish its convergence.
Try a small change
Hopper
nano hello.RChange y <- c(1.8, 2.1, 2.0, 1.9, 2.2) to y <- c(2.8, 3.1, 3.0, 2.9, 3.2). Save with Control + O, then Enter; exit with Control + X.
Run bash submit.sh and bash status.sh again. The expected mean becomes 15 / 5.01 ≈ 2.994; the check updates automatically. Restore the original observations when finished.
7. Run your research model
Start in a separate project folder. The destination my-project should not already exist; choose a new name if it does.
Hopper
cd "$HOME/jags-workshop"
cp -r hopper-jags-starter my-project
cd my-project
cp research-template.R analysis.R
source ./activate.sh
Edit analysis.R to load your data and JAGS model. The template intentionally stops until you replace its example. It shows how to use the Slurm CPU allocation, save results, and record R session information automatically. If we are working through your model together, bring your actual script, a small dataset, your package list, and any custom JAGS modules.
For research runs, use main or another authorized longer partition rather than inheriting debug's one-hour limit. This example requests four cores, 4 GB RAM, and two hours; adjust to your model and account limits.
Hopper
bash submit.sh analysis.R --partition main --cpus-per-task 4 --mem 4G --time 02:00:00Hopper
bash status.shThe copied folder retains your saved account, and a successful submission saves main as this project's partition. The helper supports --account, --partition, --cpus-per-task, --mem, --time, and --job-name; use bash submit.sh --help for details. Options work as --name value or --name=value.
Files are read relative to the project folder. Rscript --vanilla does not restore a saved workspace, so explicitly load all data and packages. Keep parallel workers within the allocated CPU count. Start with a small model, inspect resource use with status.sh, and evaluate mixing, effective sample size, Rhat, and model-specific diagnostics before interpreting results.
8. Keep a reproducibility record
Once the real model runs, save its environment alongside the code, input-data version, seeds, and job settings:
Hopper
source ./activate.sh
conda list --explicit > conda-linux-64-explicit.txt
conda env export --no-builds > environment-record.yml
Rscript --vanilla -e 'write.csv(installed.packages()[,c("Package","Version","LibPath")], "r-packages.csv", row.names=FALSE); writeLines(capture.output(sessionInfo()), "session-info.txt")'
Conda exports do not include a complete recipe for the CRAN-installed jagsUI. Keep install-jagsUI.R and r-packages.csv too. The installer selects jagsUI 1.6.3 from current CRAN or, if necessary, CRAN's archive of older versions.
Recreate the environment
Run this from a folder containing the export and installer files. The destination must be a new environment. This command accepts the exported package plan automatically:
Hopper
conda create --yes --prefix "$HOME/.conda/envs/jags-reproduced" --file conda-linux-64-explicit.txt
conda activate "$HOME/.conda/envs/jags-reproduced"
Rscript --vanilla install-jagsUI.R
This export-and-reinstall path was tested on Hopper, including a successful scheduled demo in the rebuilt environment.
To test that environment with the helpers, run export JAGS_ENV_PREFIX="$HOME/.conda/envs/jags-reproduced" before activation and submission. Run unset JAGS_ENV_PREFIX to return to the default. These exports target compatible Hopper Linux systems, not your Mac or Windows R installation.
Troubleshooting
| Symptom | What to do |
|---|---|
conda: command not found | Load the existing installation in Step 3, or install Miniforge. |
Run 'conda init' before 'conda activate' | Use source ./activate.sh or source your installation's conda.sh. |
Permission denied during login | Check VPN, username, and password; contact support if it persists. |
Permission denied during setup | Confirm the destination is your own home directory. |
| Environment already exists | Skip setup, then activate and verify. |
there is no package called ... | Check the active R and the first installation error. |
| rjags cannot find JAGS | Use R and JAGS from the same Conda environment. |
Invalid account or account/partition combination specified | Check your account listing; retry with --reset or explicit account and partition. |
| Saved settings are wrong or malformed | Run bash submit.sh --reset. Settings are only saved after accepted submissions. |
No log or job is PENDING | Wait for resources, then check status again. |
OUT_OF_MEMORY, TIMEOUT, or no PASS | Read the log before changing resource requests. |
| Quota or checksum error | Stop and retain the error; check quota or retry the official download. |
Email ndodds@g.hmc.edu or hpc-help@its.cmc.edu with your command, full error, job ID, and log. Never send a password. Cancel your own unwanted job with scancel followed by its actual job ID.
Validation and references
The example, fresh installation, Miniforge initialization, generated plots, and downloaded starter have been tested on Hopper. The current details are in VALIDATION.txt inside the ZIP. Each person's access and research-specific dependencies still need their own check.
The Miniforge installer was tested in batch mode; the guide uses its interactive prompts. The automatic CRAN archive fallback has not been exercised because version 1.6.3 is currently available on CRAN.